Aan de slag met Alarm Lock: je eerste wekker

De eerste keer dat je Alarm Lock opent, krijg je een kort welkomstscherm dat het idee uitlegt. Omdat je nog geen wekker hebt ingesteld, kom je meteen terecht bij het aanmaken van je eerste wekker. Om die te activeren, moet je een NFC-tag registreren.
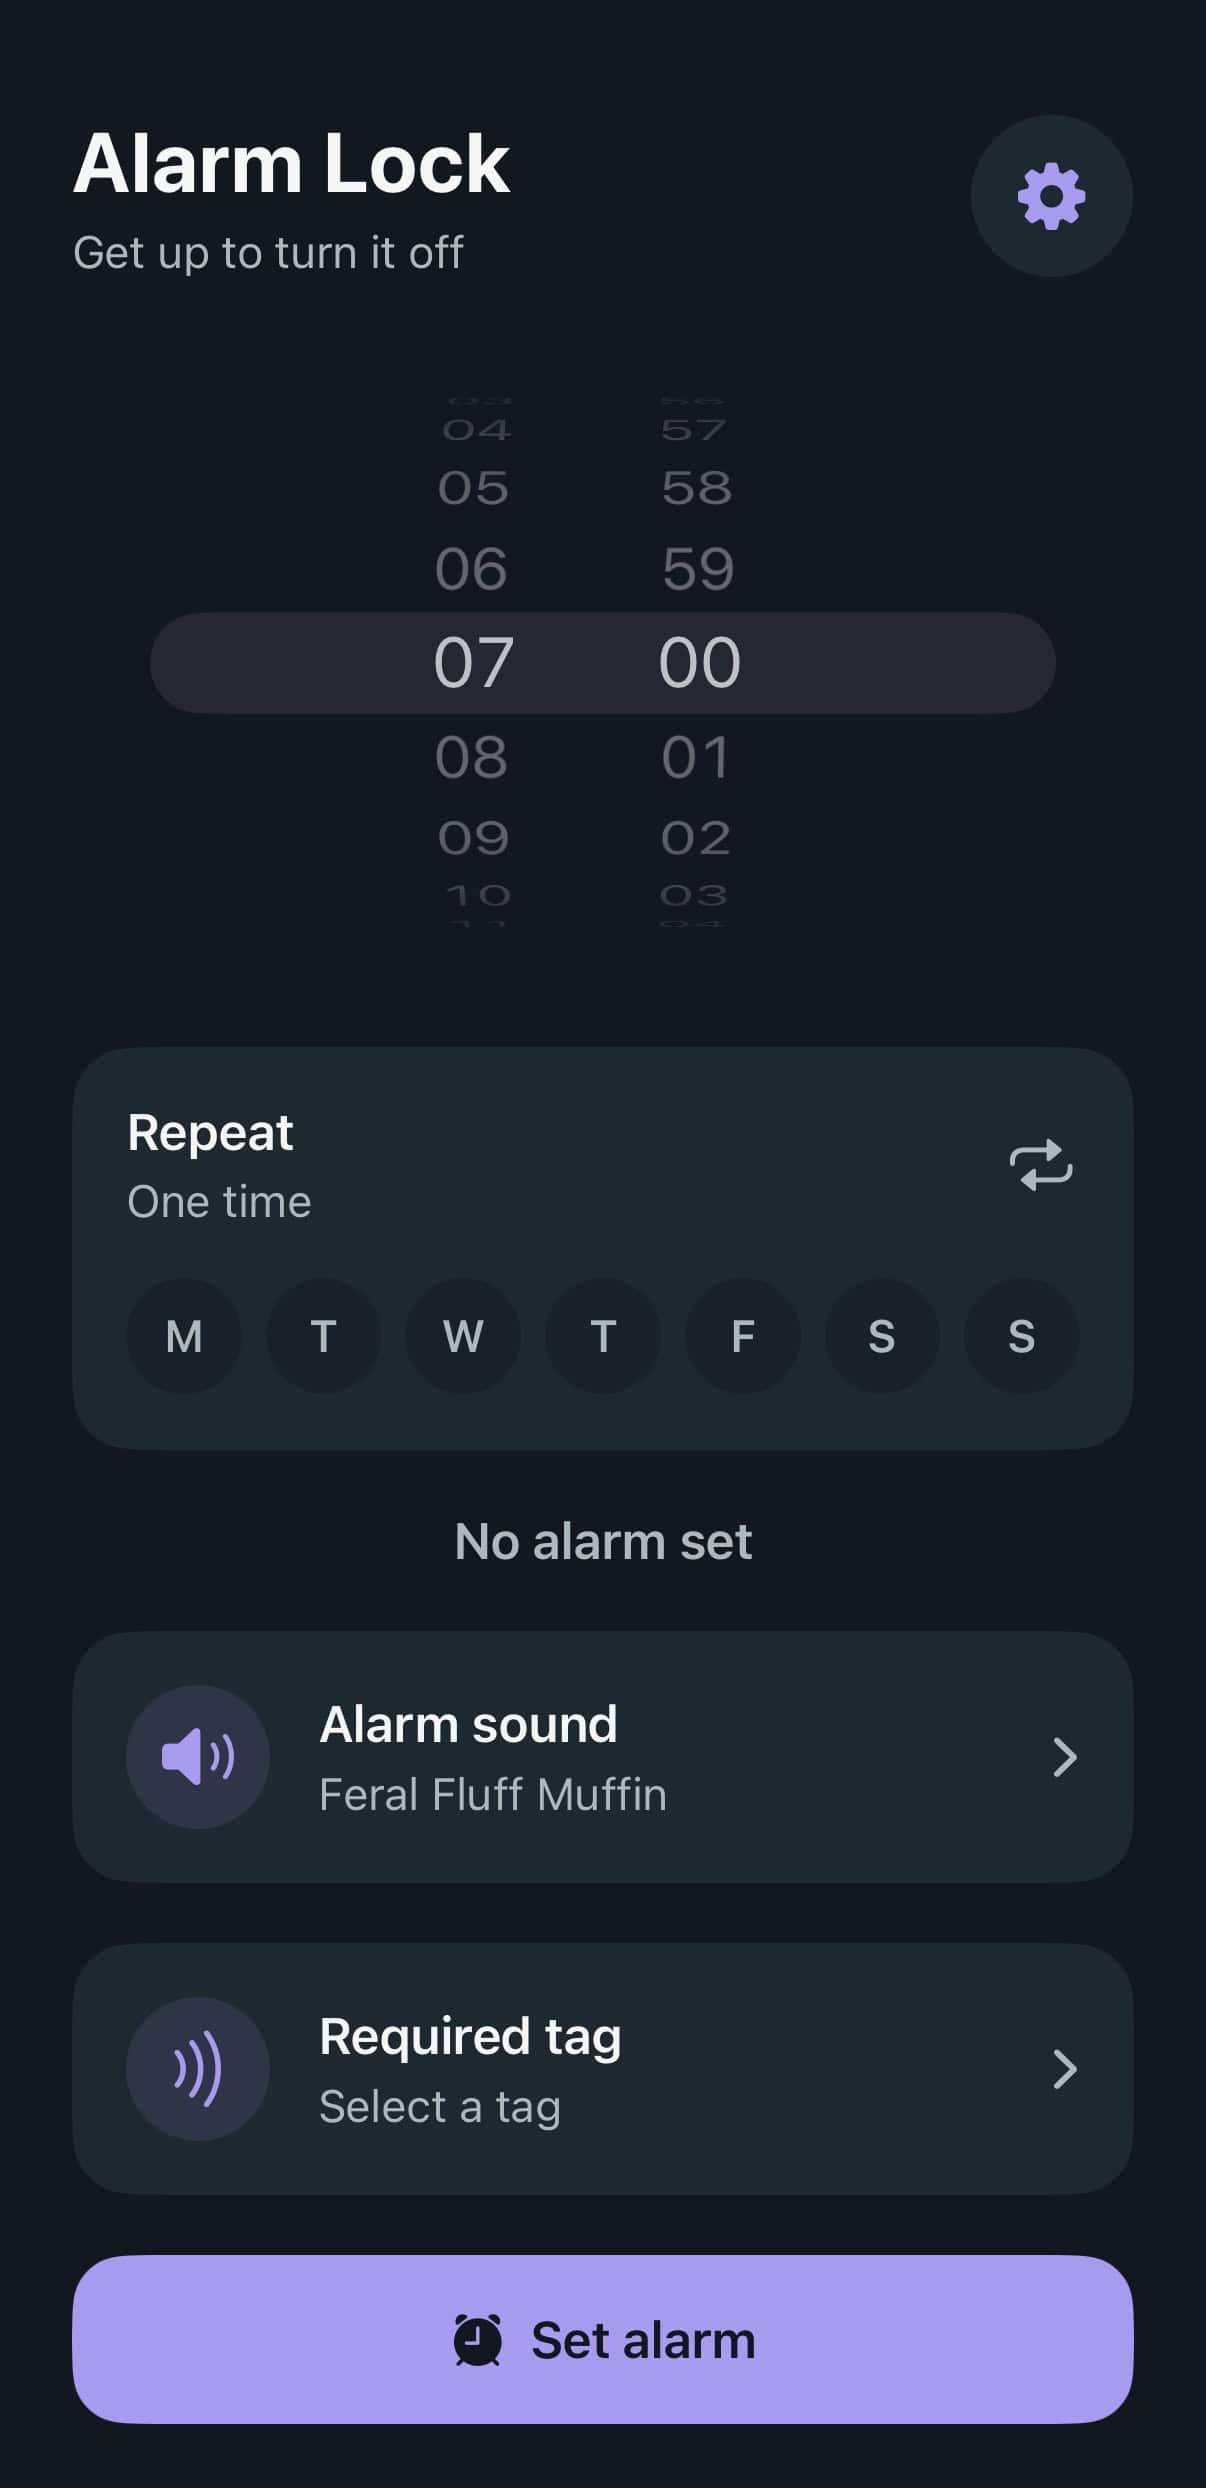
Wekker instellen-scherm van Alarm Lock met tijdkiezer, nog geen tag geselecteerd

1. Kies een tijd

Je komt meteen in de wekker-aanmaker terecht. Kies je tijd — de rest van dit scherm vult zich vanzelf aan terwijl je verdergaat.
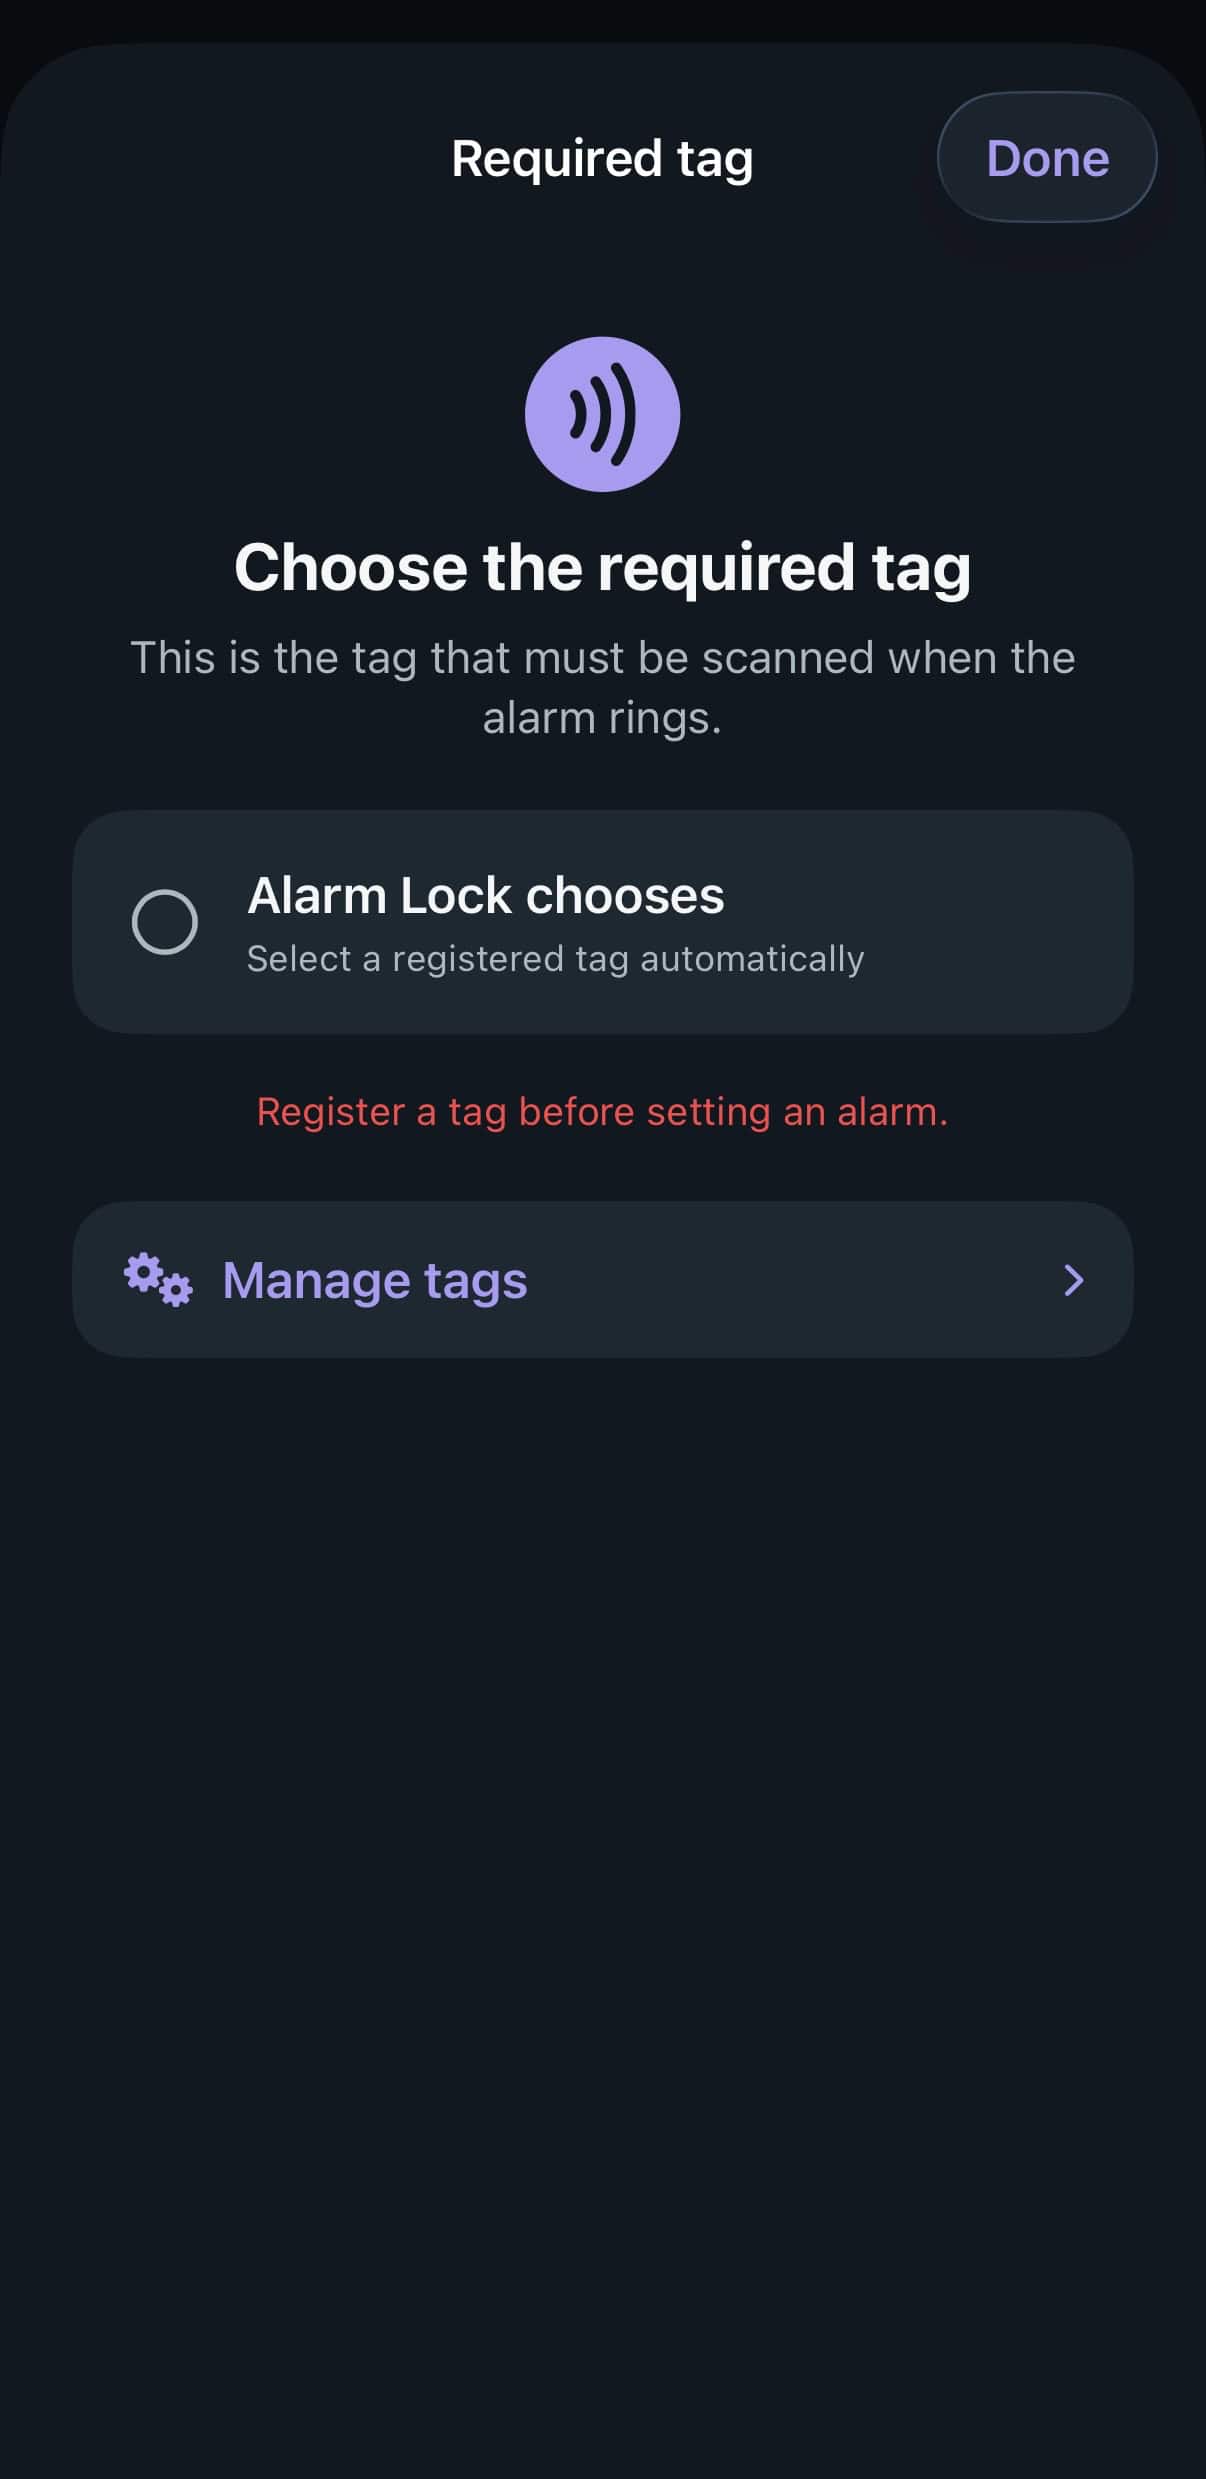
Scherm Required tag met de melding Register a tag before setting an alarm

2. Hier houdt hij je expres tegen

Tik op “Required tag” en omdat je er nog geen hebt geregistreerd, houdt Alarm Lock je hier tegen. Het heeft geen zin een wekker in te stellen die je niet daadwerkelijk kunt uitzetten.
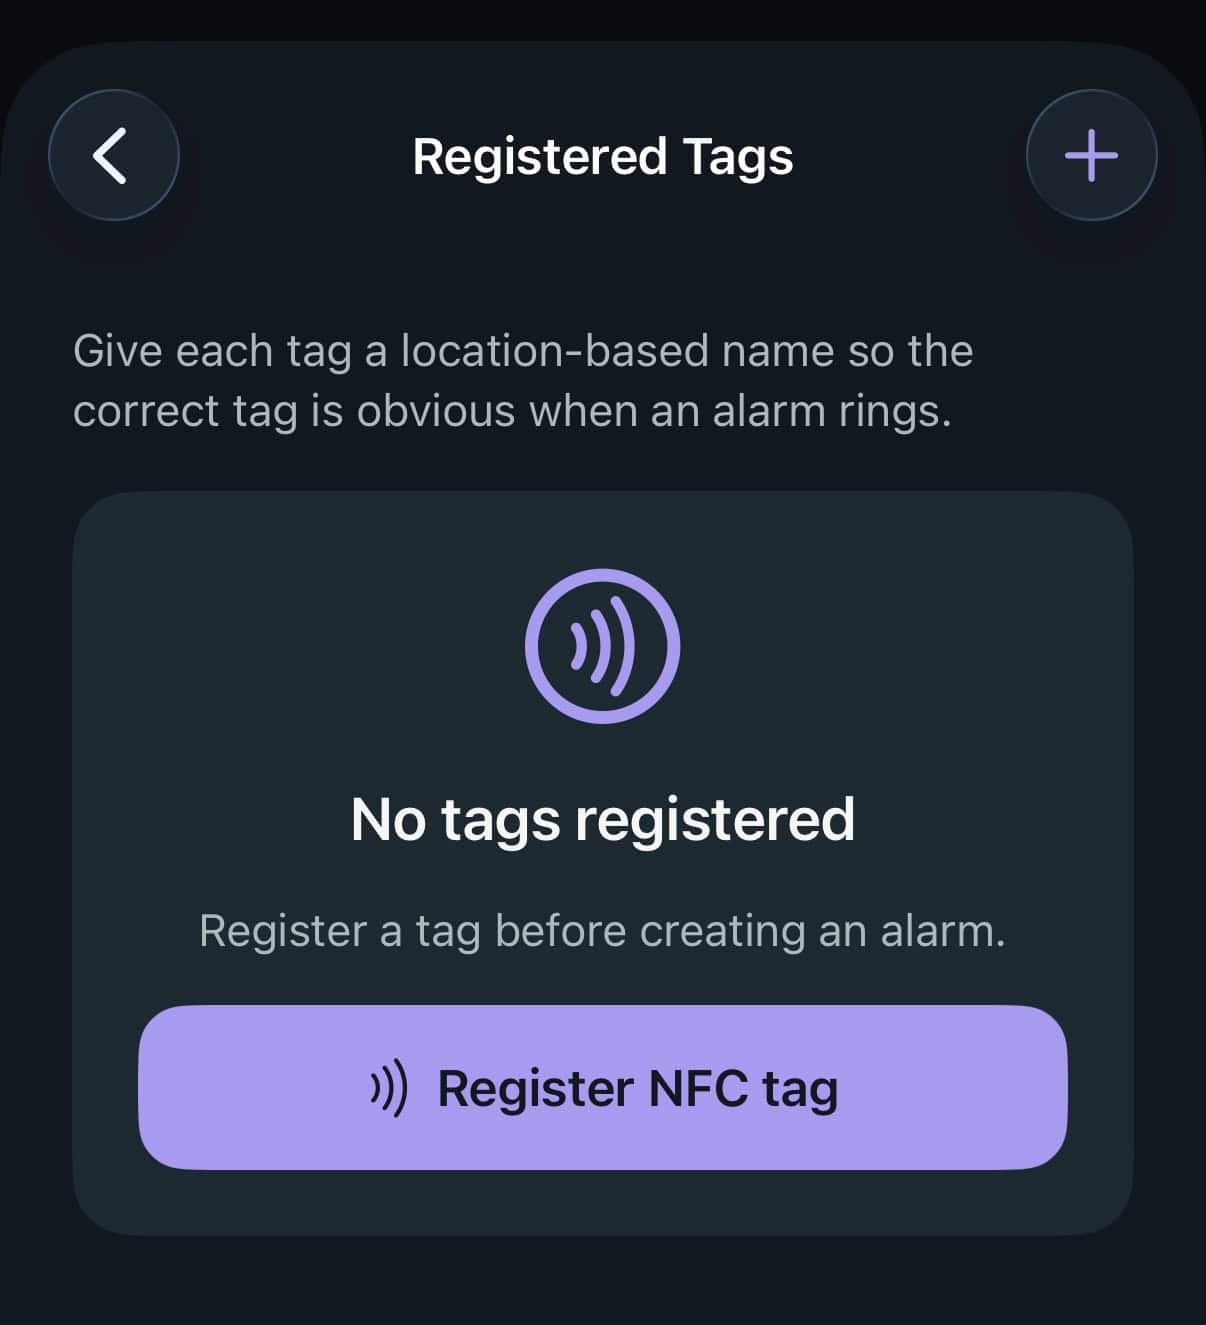
Registered Tags-scherm met No tags registered

3. Begin bij een lege lijst

Tik op “Manage tags” om naar je tag-lijst te gaan. Deze is voorlopig nog leeg.
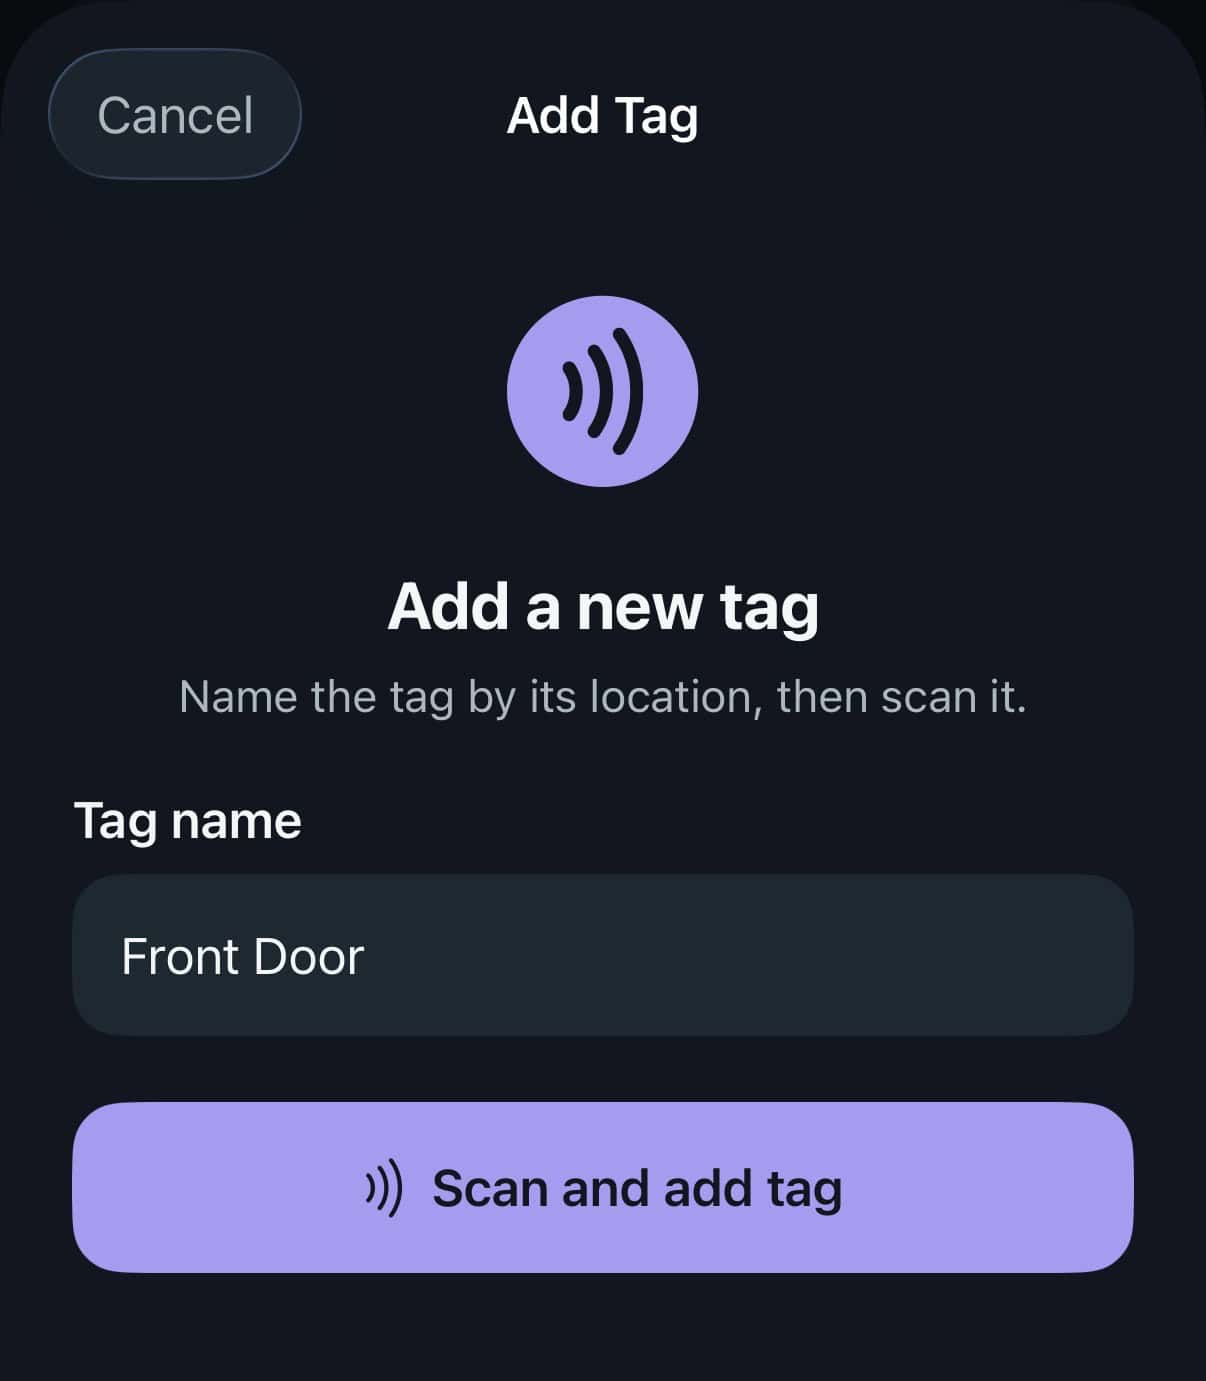
Add Tag-scherm met de naam Front Door ingevuld, klaar om te scannen

4. Registreer je eerste tag

Tik op “Register NFC tag”, geef hem een naam op basis van waar je hem neerlegt en scan hem. “Front Door” vertelt je om zeven uur ‘s ochtends iets nuttigs; “Tag 1” niet. Tik op “Scan and add tag” om je tag te registreren.
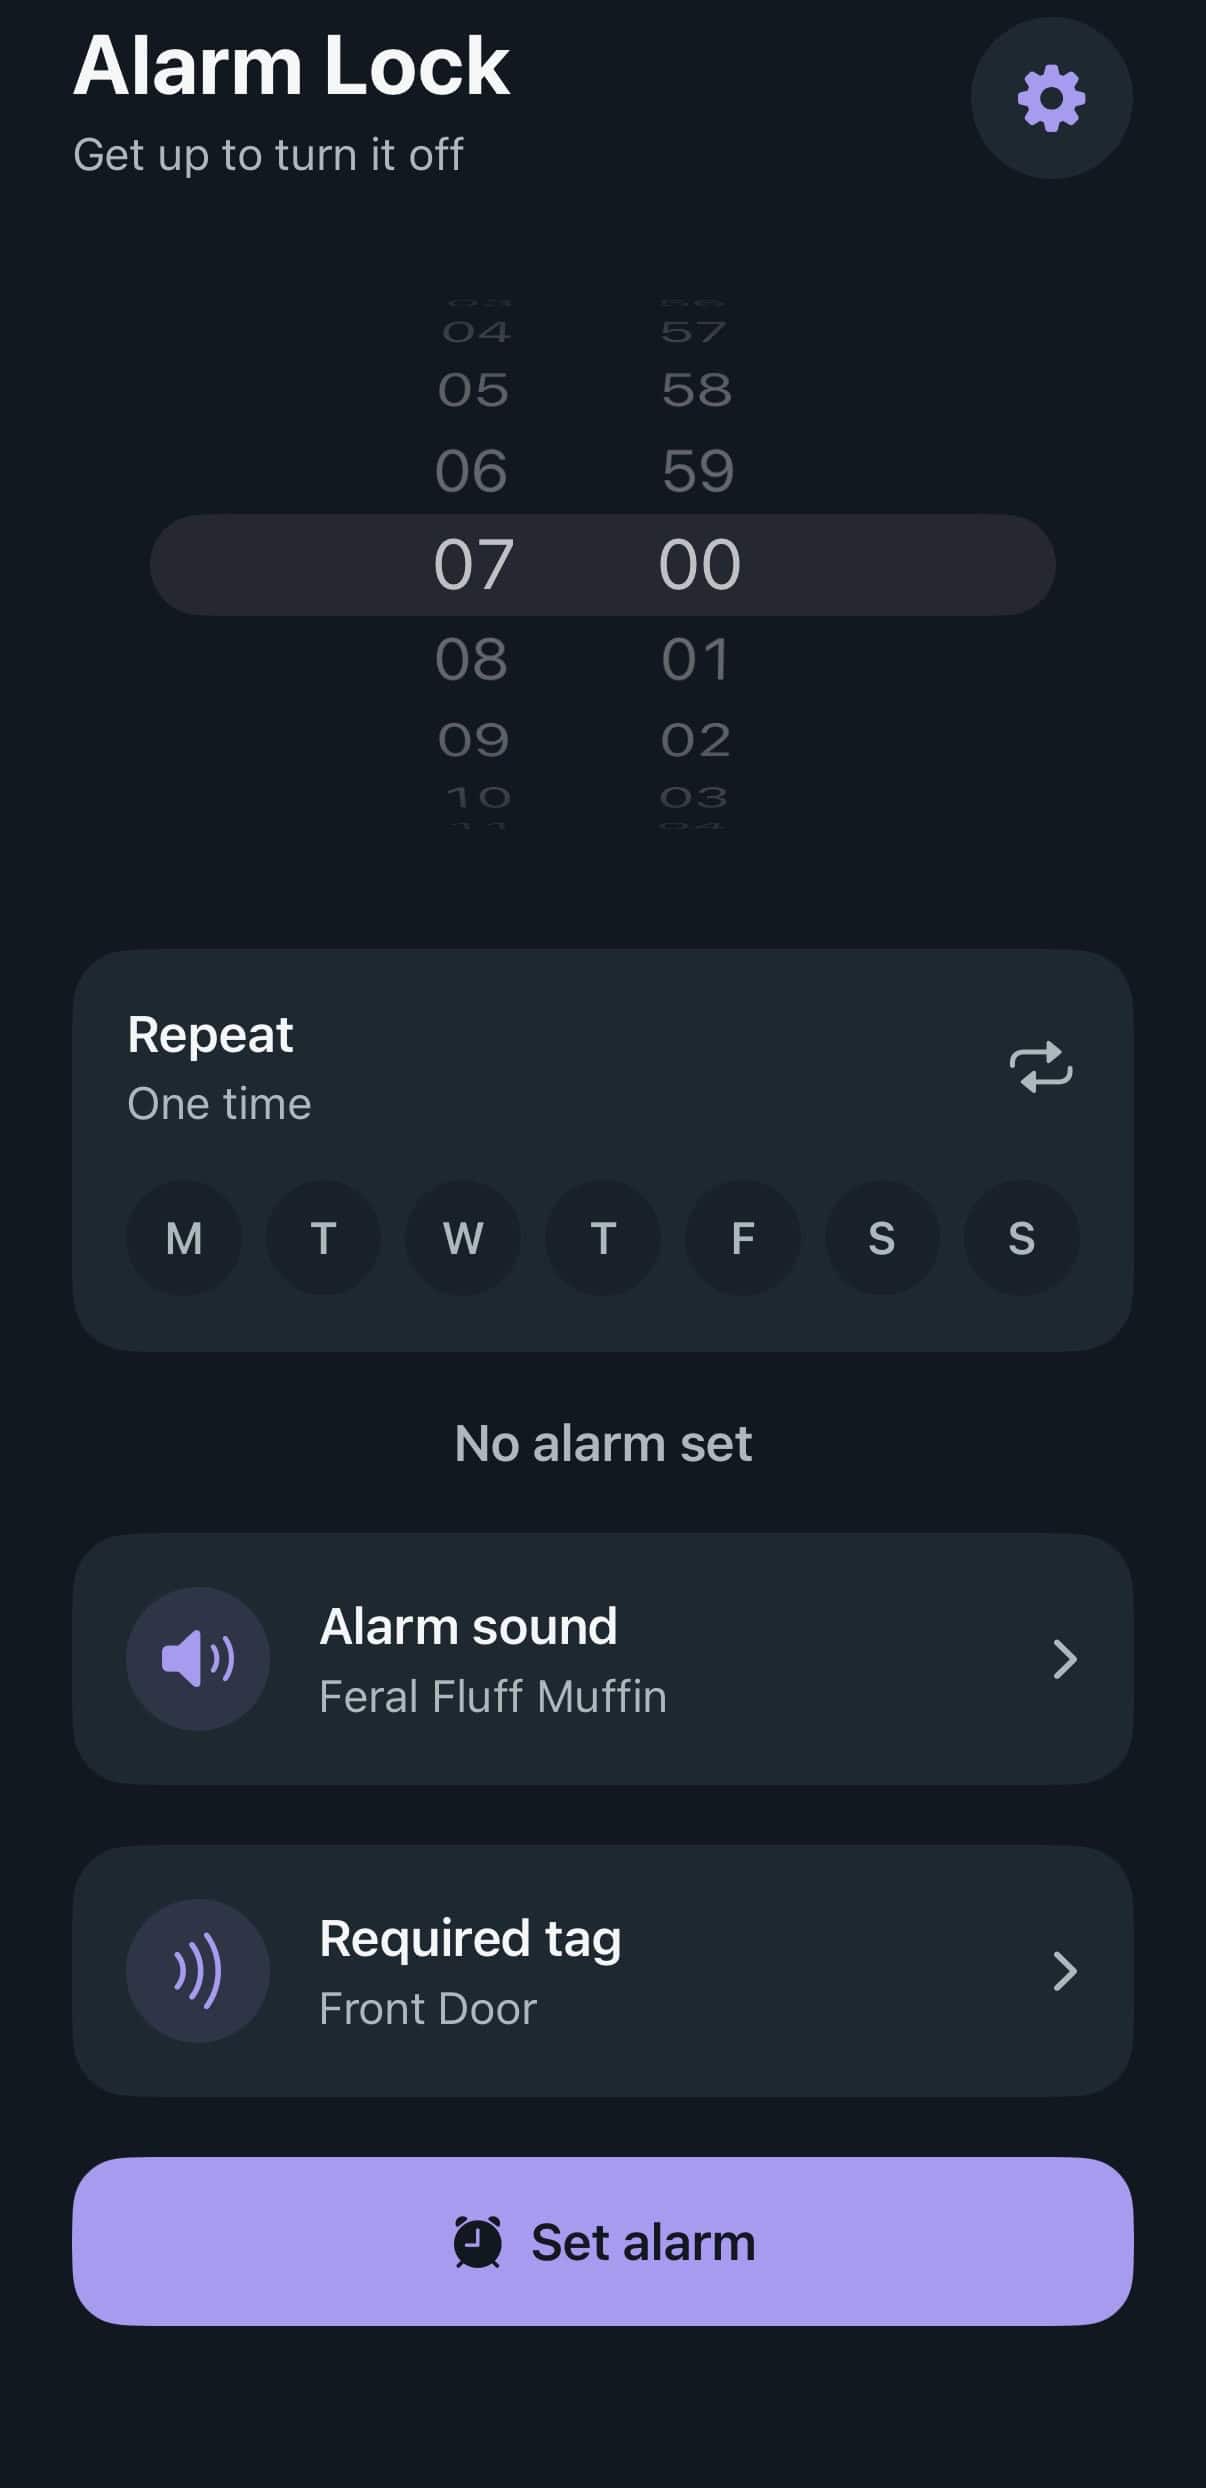
Wekker instellen-scherm met Front Door nu geselecteerd als vereiste tag

5. Je tag staat ingesteld

Terug op het wekkerscherm staat je nieuwe tag nu geselecteerd als vereiste tag.
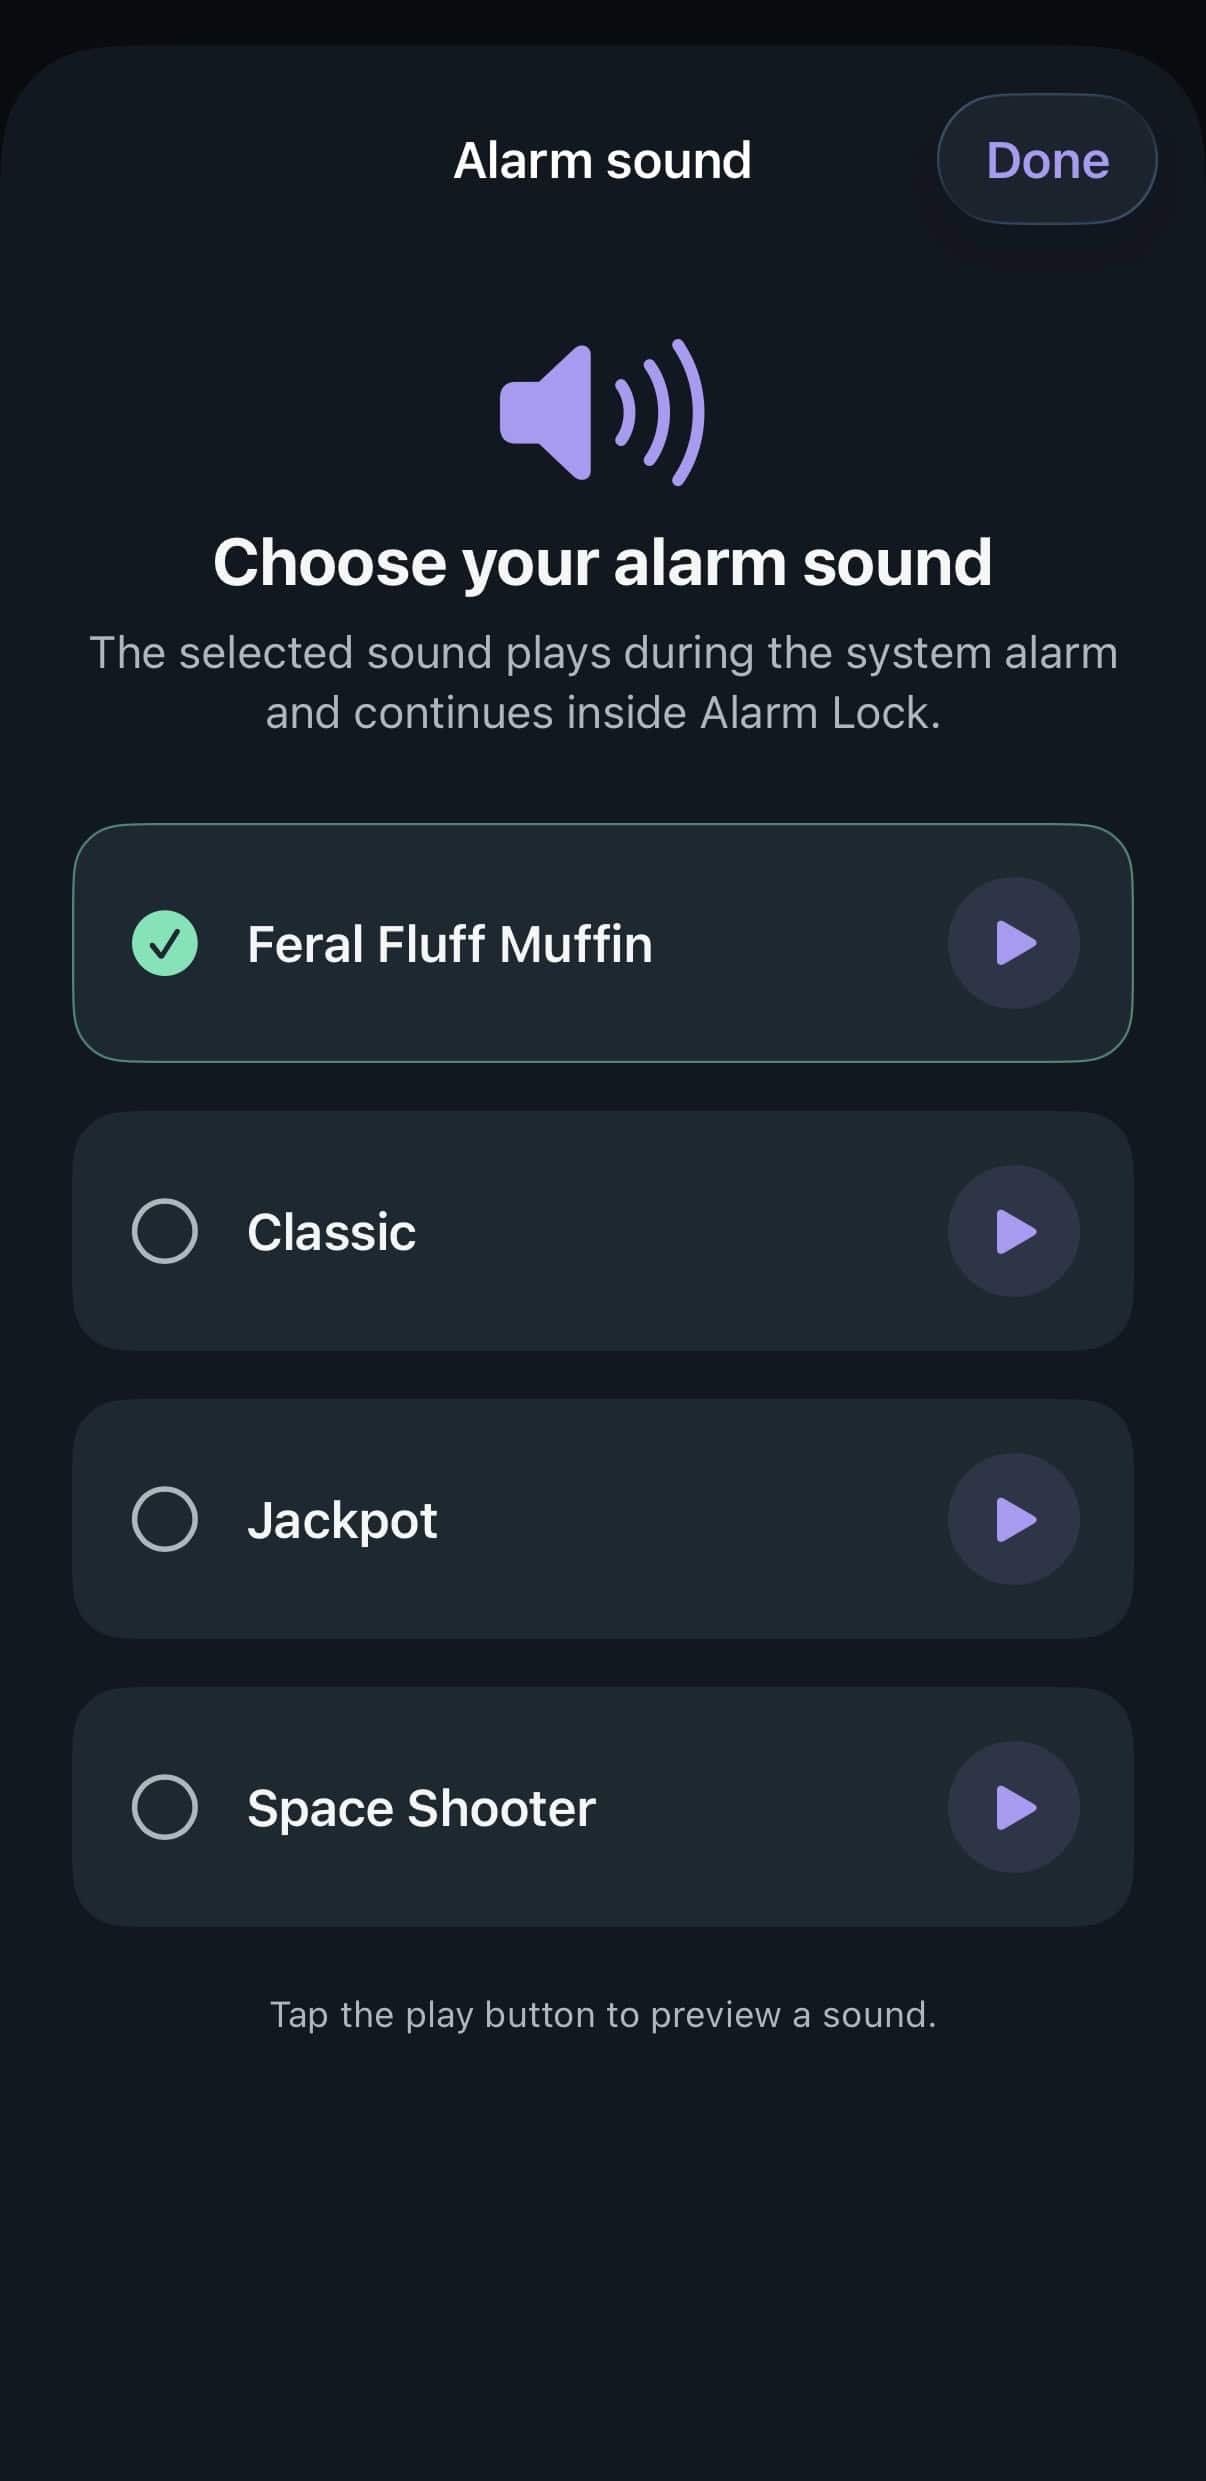
Wekkergeluid-kiezer met Feral Fluff Muffin geselecteerd

6. Kies een geluid

Kies een wekkergeluid. Tik op de afspeelknop bij elk geluid om het te beluisteren voordat je besluit er ‘s ochtends wakker van te worden.
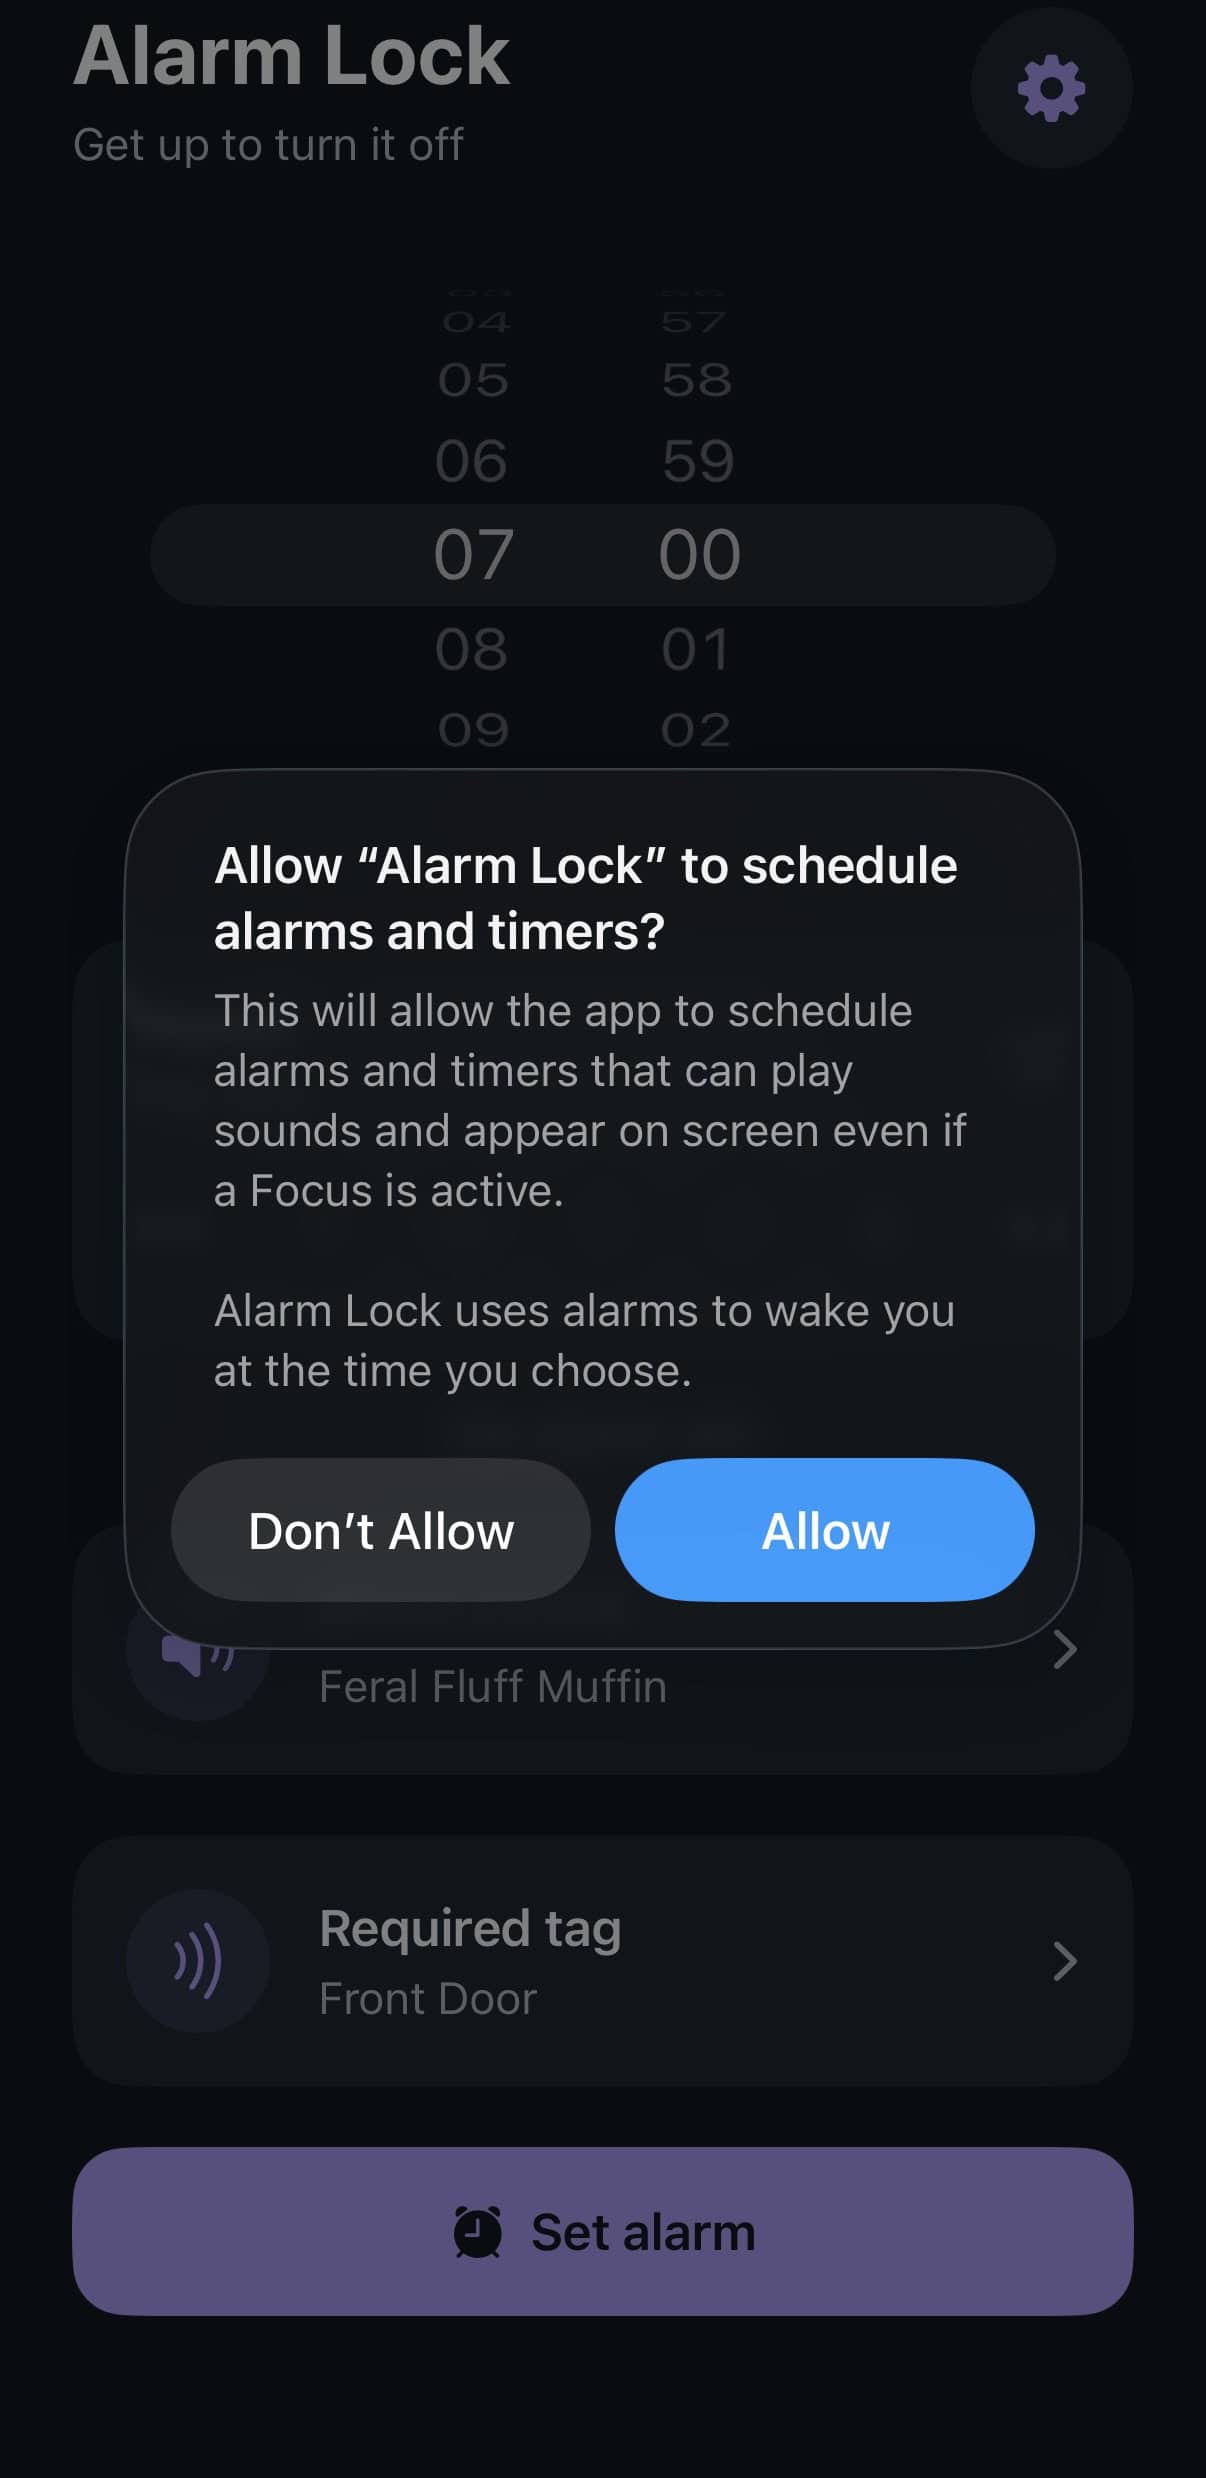
iOS-systeemvraag om Alarm Lock toestemming te geven wekkers en timers in te plannen

7. Sta de eenmalige systeemvraag toe

De eerste keer dat je op “Set alarm” tikt, vraagt iOS toestemming voor Alarm Lock om wekkers en timers in te plannen. Dit is een standaard systeemvraag, iets wat Alarm Lock niet kan overslaan. Tik op Allow, anders gaat de wekker niet echt af.
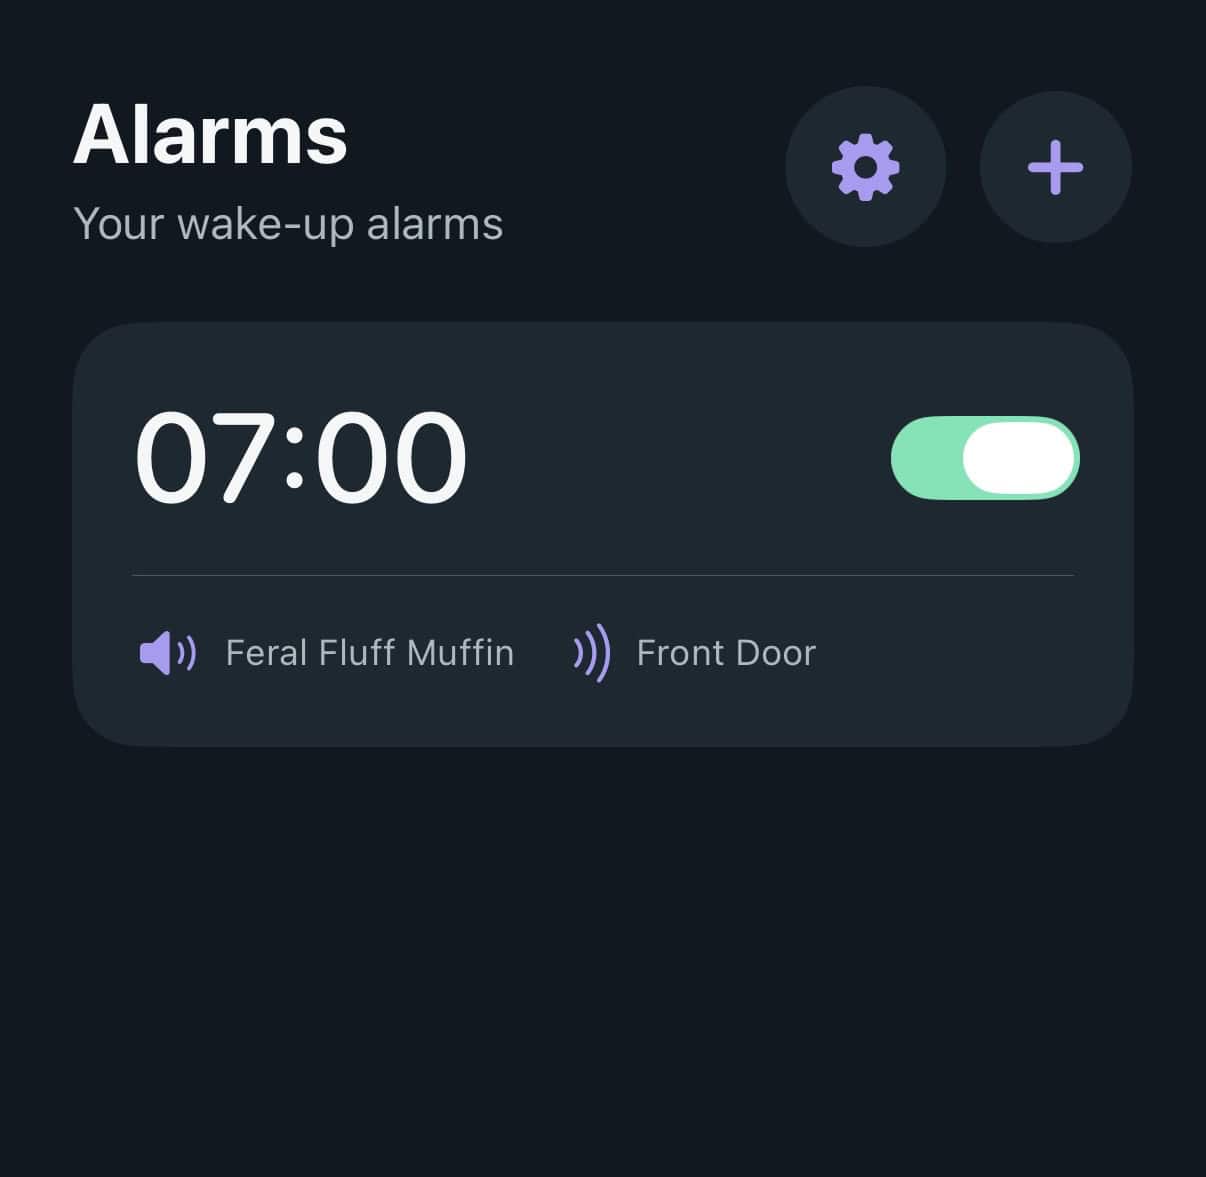
Alarms-scherm met een wekker om 7:00 met Feral Fluff Muffin en Front Door

8. Klaar

Je wekker staat nu op het hoofdscherm Alarms, met het geluid en de vereiste tag eronder vermeld.
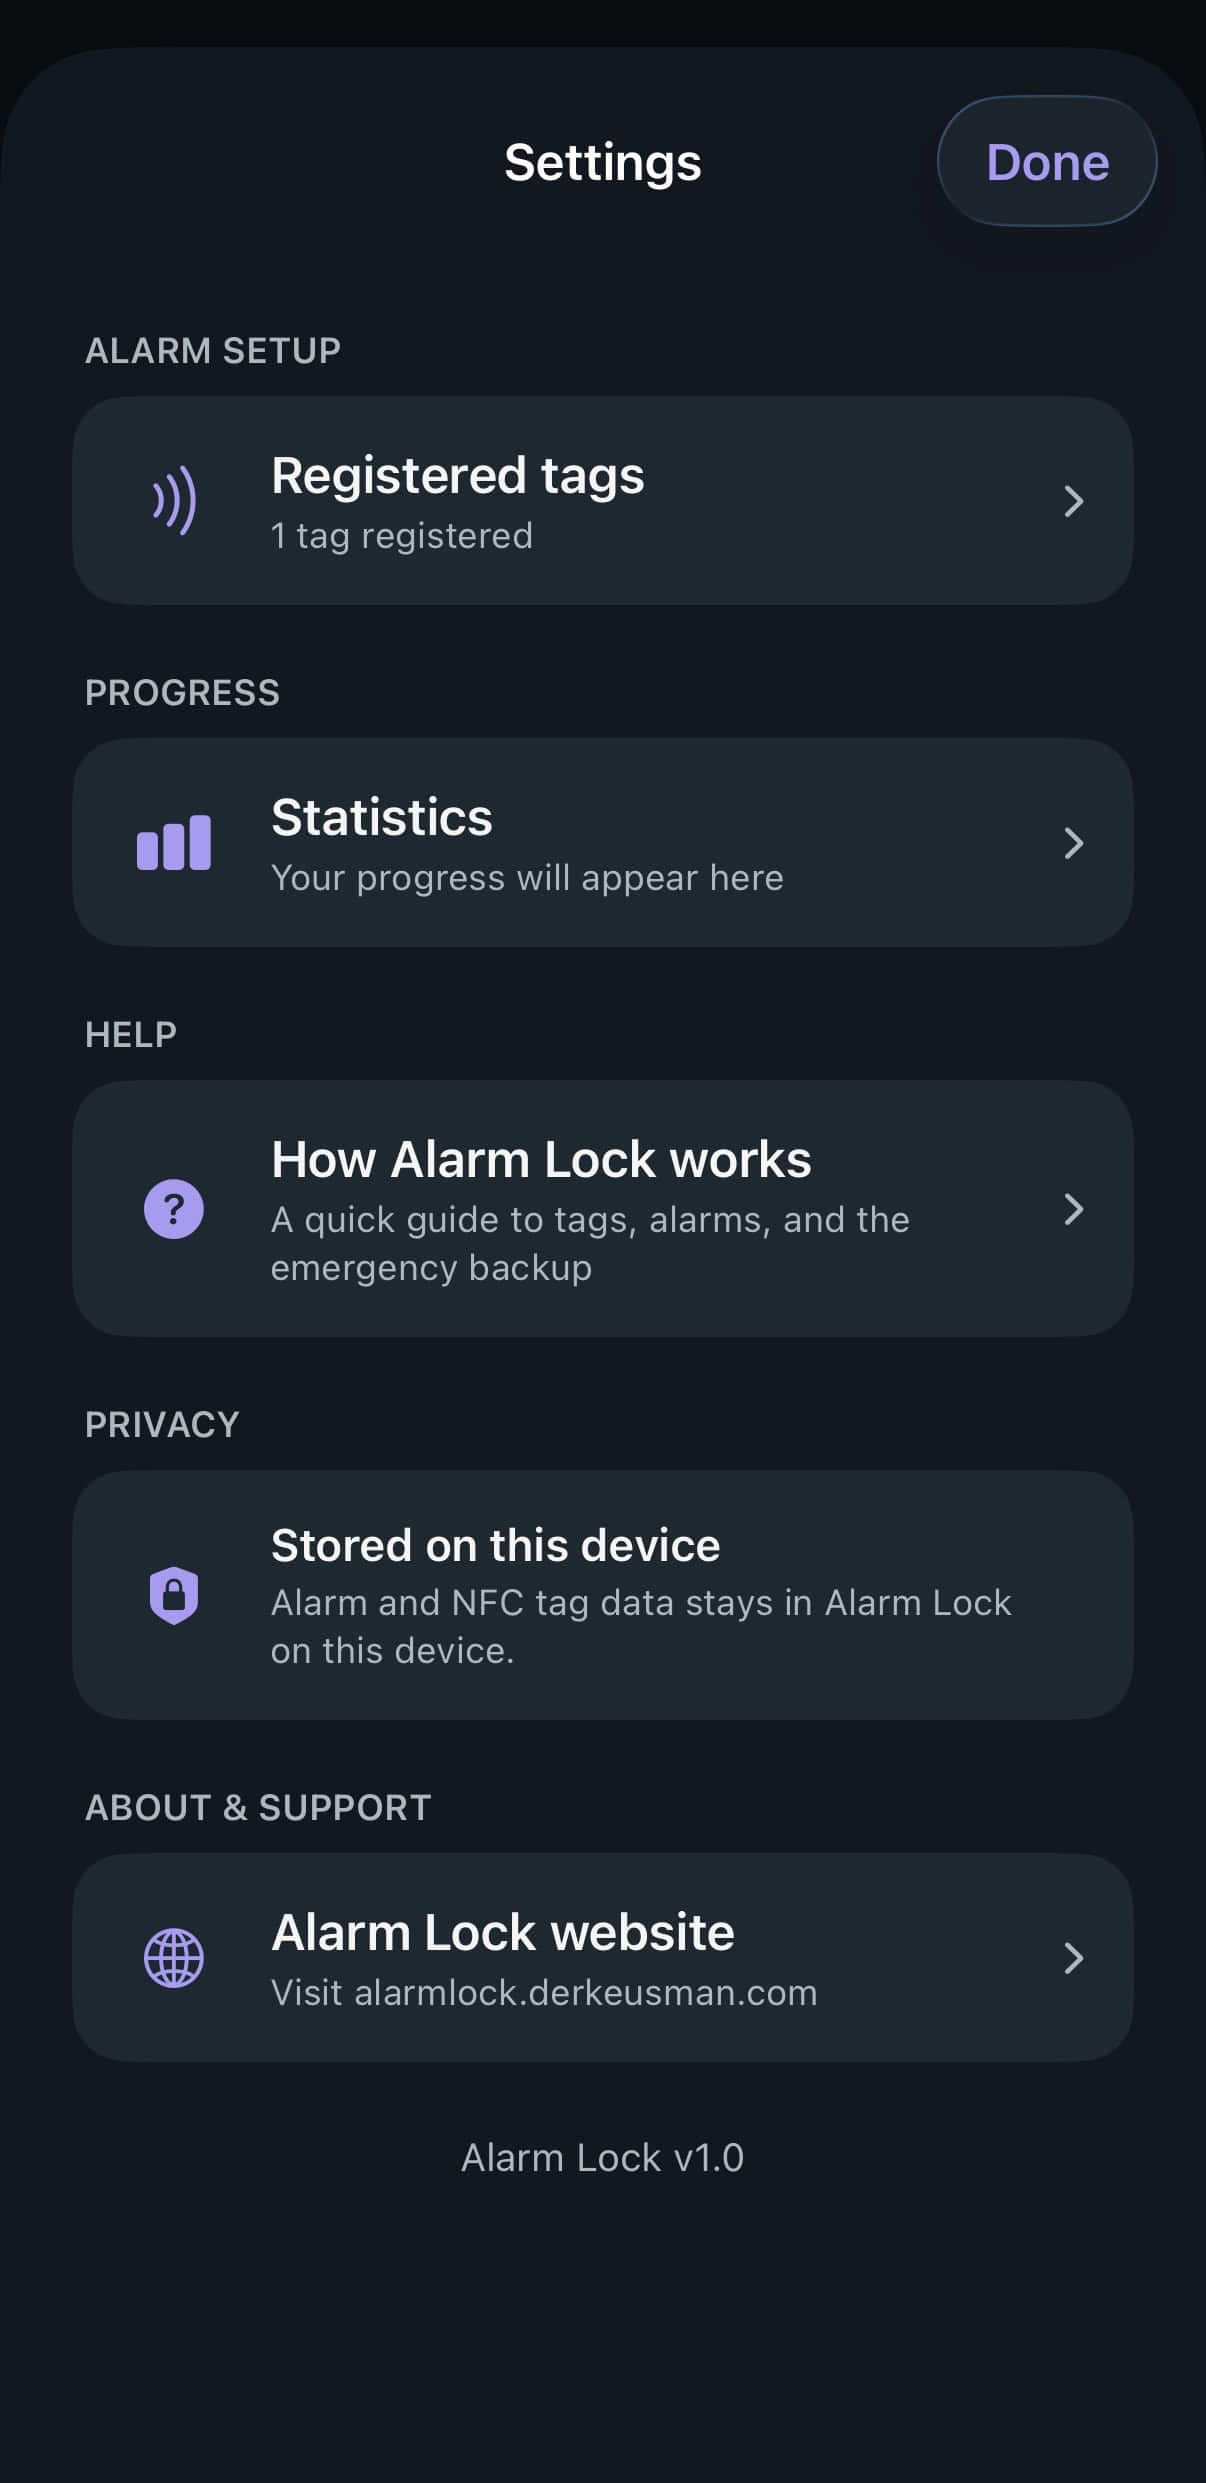
Instellingenscherm van Alarm Lock met geregistreerde tags, statistieken, hulp en privacy

9. Ook de moeite waard: Instellingen

Het Instellingen-scherm heeft een gids “How Alarm Lock works” die tags, wekkers en de nood-back-up uitgebreider uitlegt, plus een simpele privacynotitie: wekker- en taggegevens blijven op dit toestel.

Dat is het! Je bent klaar. Als een van deze stappen niet overeenkwam met wat je zag, of iets voelde verwarrend, is dat precies het soort feedback dat de moeite waard is om via TestFlight te sturen.
Dit is nog een betaversie, vertrouw er voorlopig nog niet op dat Alarm Lock je ‘s ochtends wakker maakt.
Getting started with Alarm Lock: your first alarm

The first time you open Alarm Lock, a short getting-started screen introduces the idea. Since you won’t have an alarm set yet, it drops you straight into creating your first one. In order to activate it, you will need to register an NFC tag.

Alarm Lock's set alarm screen with a time picker, no tag selected yet

1. Pick a time

You land on the alarm creator right away. Pick your time, everything else on this screen fills in as you go.

Required tag screen showing Register a tag before setting an alarm

2. It stops you here, on purpose

Tap “Required tag” and, since you haven’t registered one yet, Alarm Lock stops you here on purpose. There’s no point setting an alarm you can’t actually dismiss.

Registered Tags screen showing No tags registered

3. Start from an empty list

Tap “Manage tags” to go to your tag list it’s empty, for now.

Add Tag screen with the name Front Door entered, ready to scan

4. Register your first tag

Tap “Register NFC tag,” give it a name based on where you’re putting it and scan it. “Front Door” tells you something useful at 6am; “Tag 1” doesn’t. Tap “Scan and add tag” to register your tag.

Set alarm screen with Front Door now selected as the required tag

5. Your tag is set

Back on the alarm screen, your new tag is now selected as the required tag.

Alarm sound picker with Feral Fluff Muffin selected

6. Pick a sound

Pick an alarm sound. Tap the play button on each to preview before you commit to waking up to it in the morning.

iOS system prompt asking to allow Alarm Lock to schedule alarms and timers

7. Allow the one-time system prompt

The first time you tap “Set alarm,” iOS asks permission for Alarm Lock to schedule alarms and timers. This is a standard system prompt, not something Alarm Lock can skip. Tap Allow, or the alarm won’t actually go off.

Alarms screen showing a 7:00 alarm with Feral Fluff Muffin and Front Door

8. Done

Your alarm now shows up on the main Alarms screen, with its sound and required tag listed underneath.

Alarm Lock Settings screen with registered tags, statistics, help, and privacy sections

9. Worth a look: Settings

The Settings screen has a “How Alarm Lock works” guide covering tags, alarms, and the emergency backup in more detail, plus a straightforward privacy note: alarm and tag data stays on this device.

That’s it! You’re set up. If any of these steps didn’t match what you saw, or something felt confusing, that’s exactly the kind of feedback worth sending through TestFlight.
This is still a beta version, please do not yet rely on Alarm Lock to wake you up in the morning

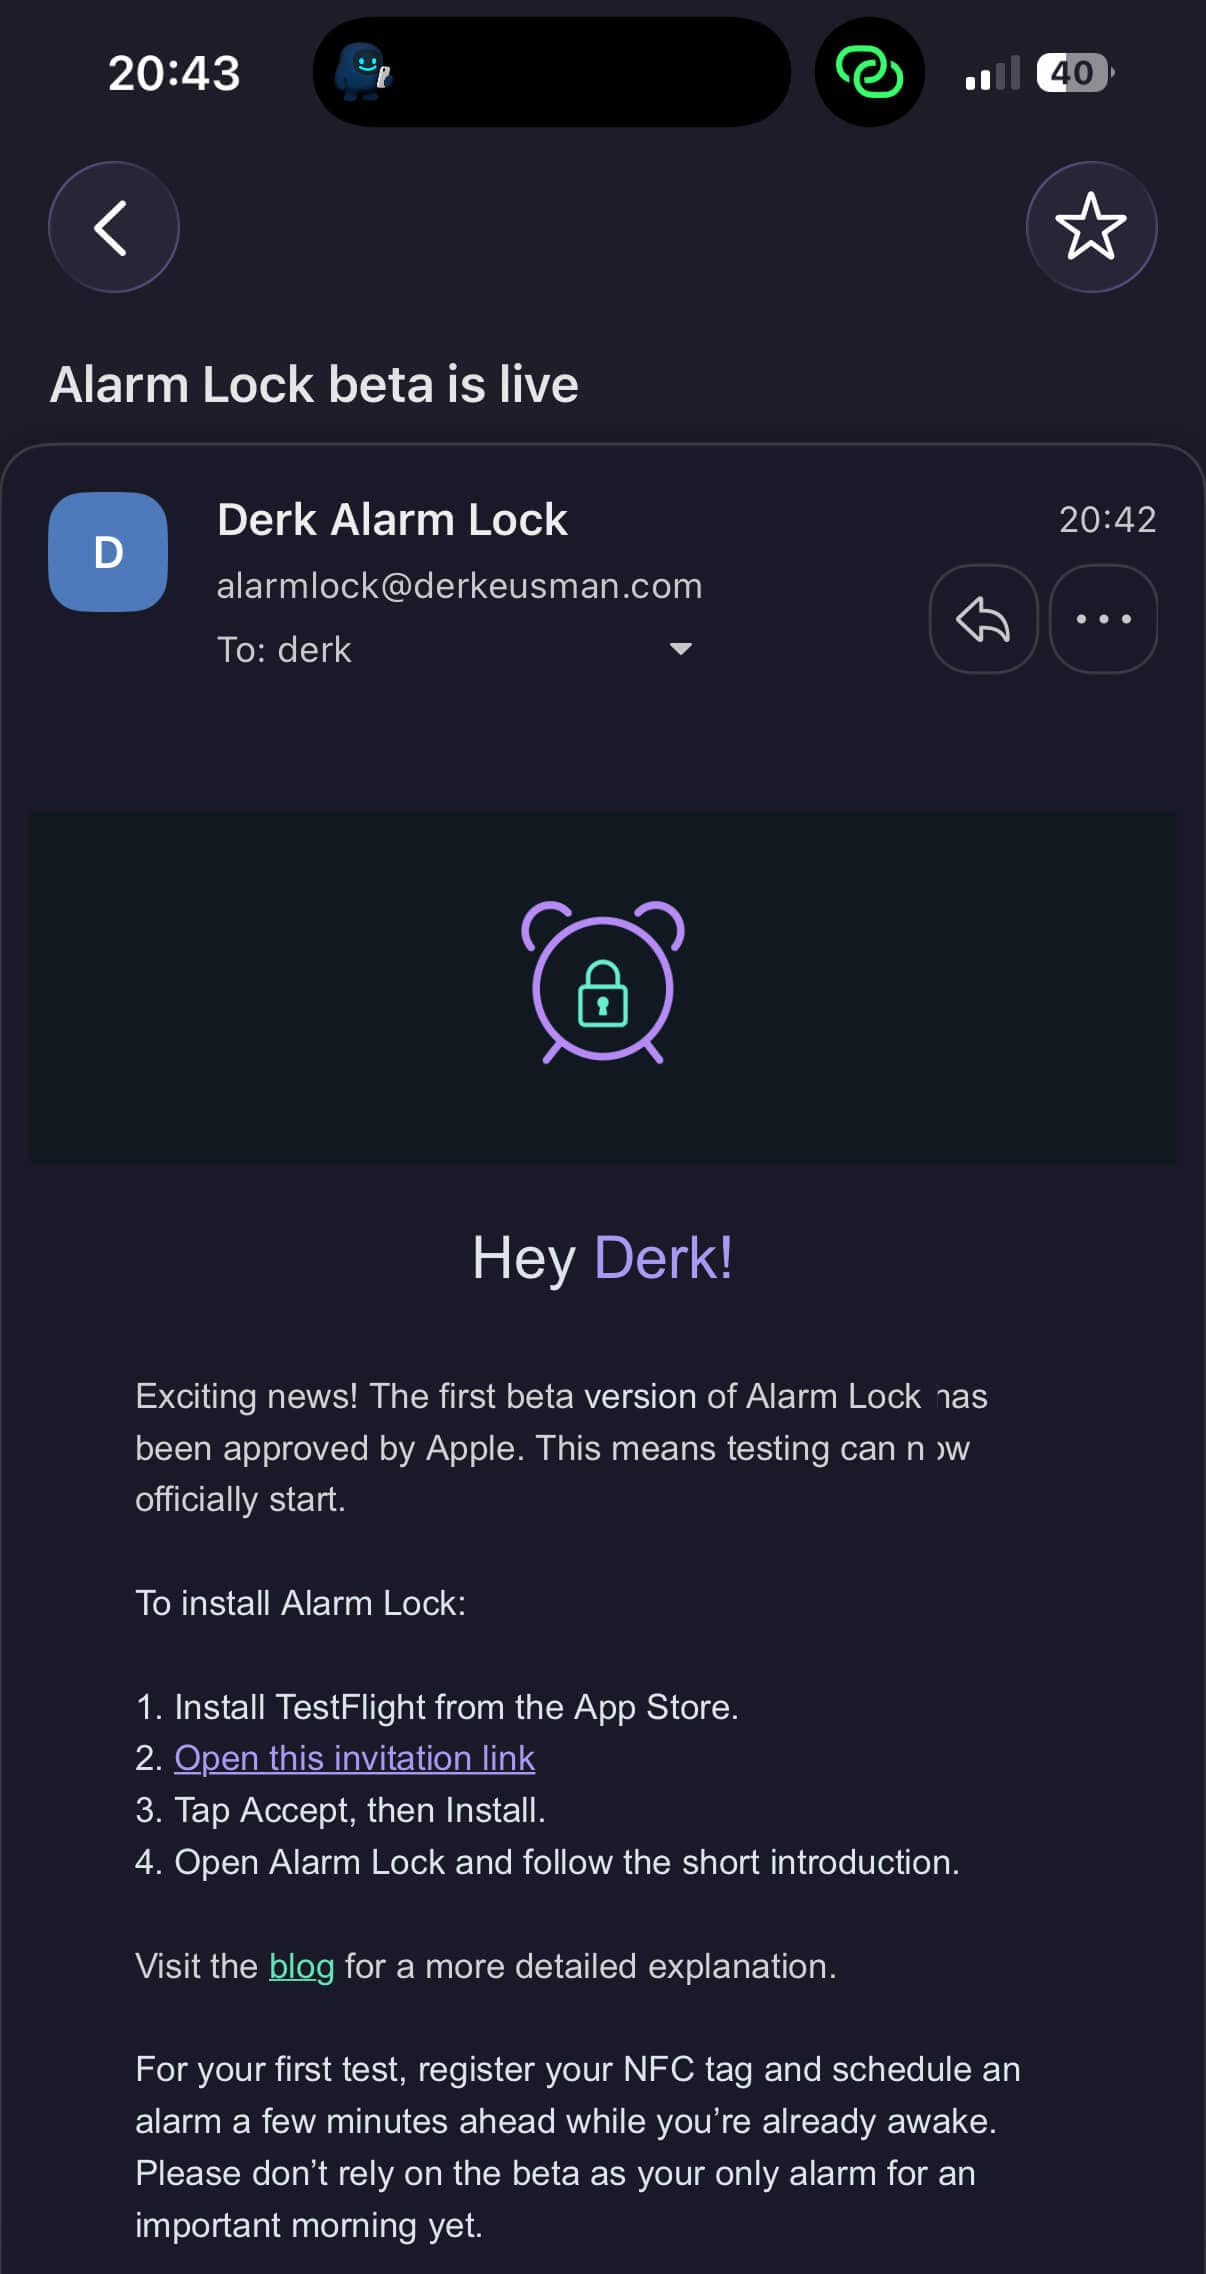
How to join the Alarm Lock beta on TestFlight

Alarm Lock beta builds are distributed through Apple’s TestFlight. The standard, official way to test iOS apps before they’re on the App Store. It’s free and made by Apple.

TestFlight invite email with a View in TestFlight button

1. Get your invite

Once the app is ready to be tested, you’ll get an email with an invite link. Open that email on the iPhone you want to test on. it makes the next steps faster.

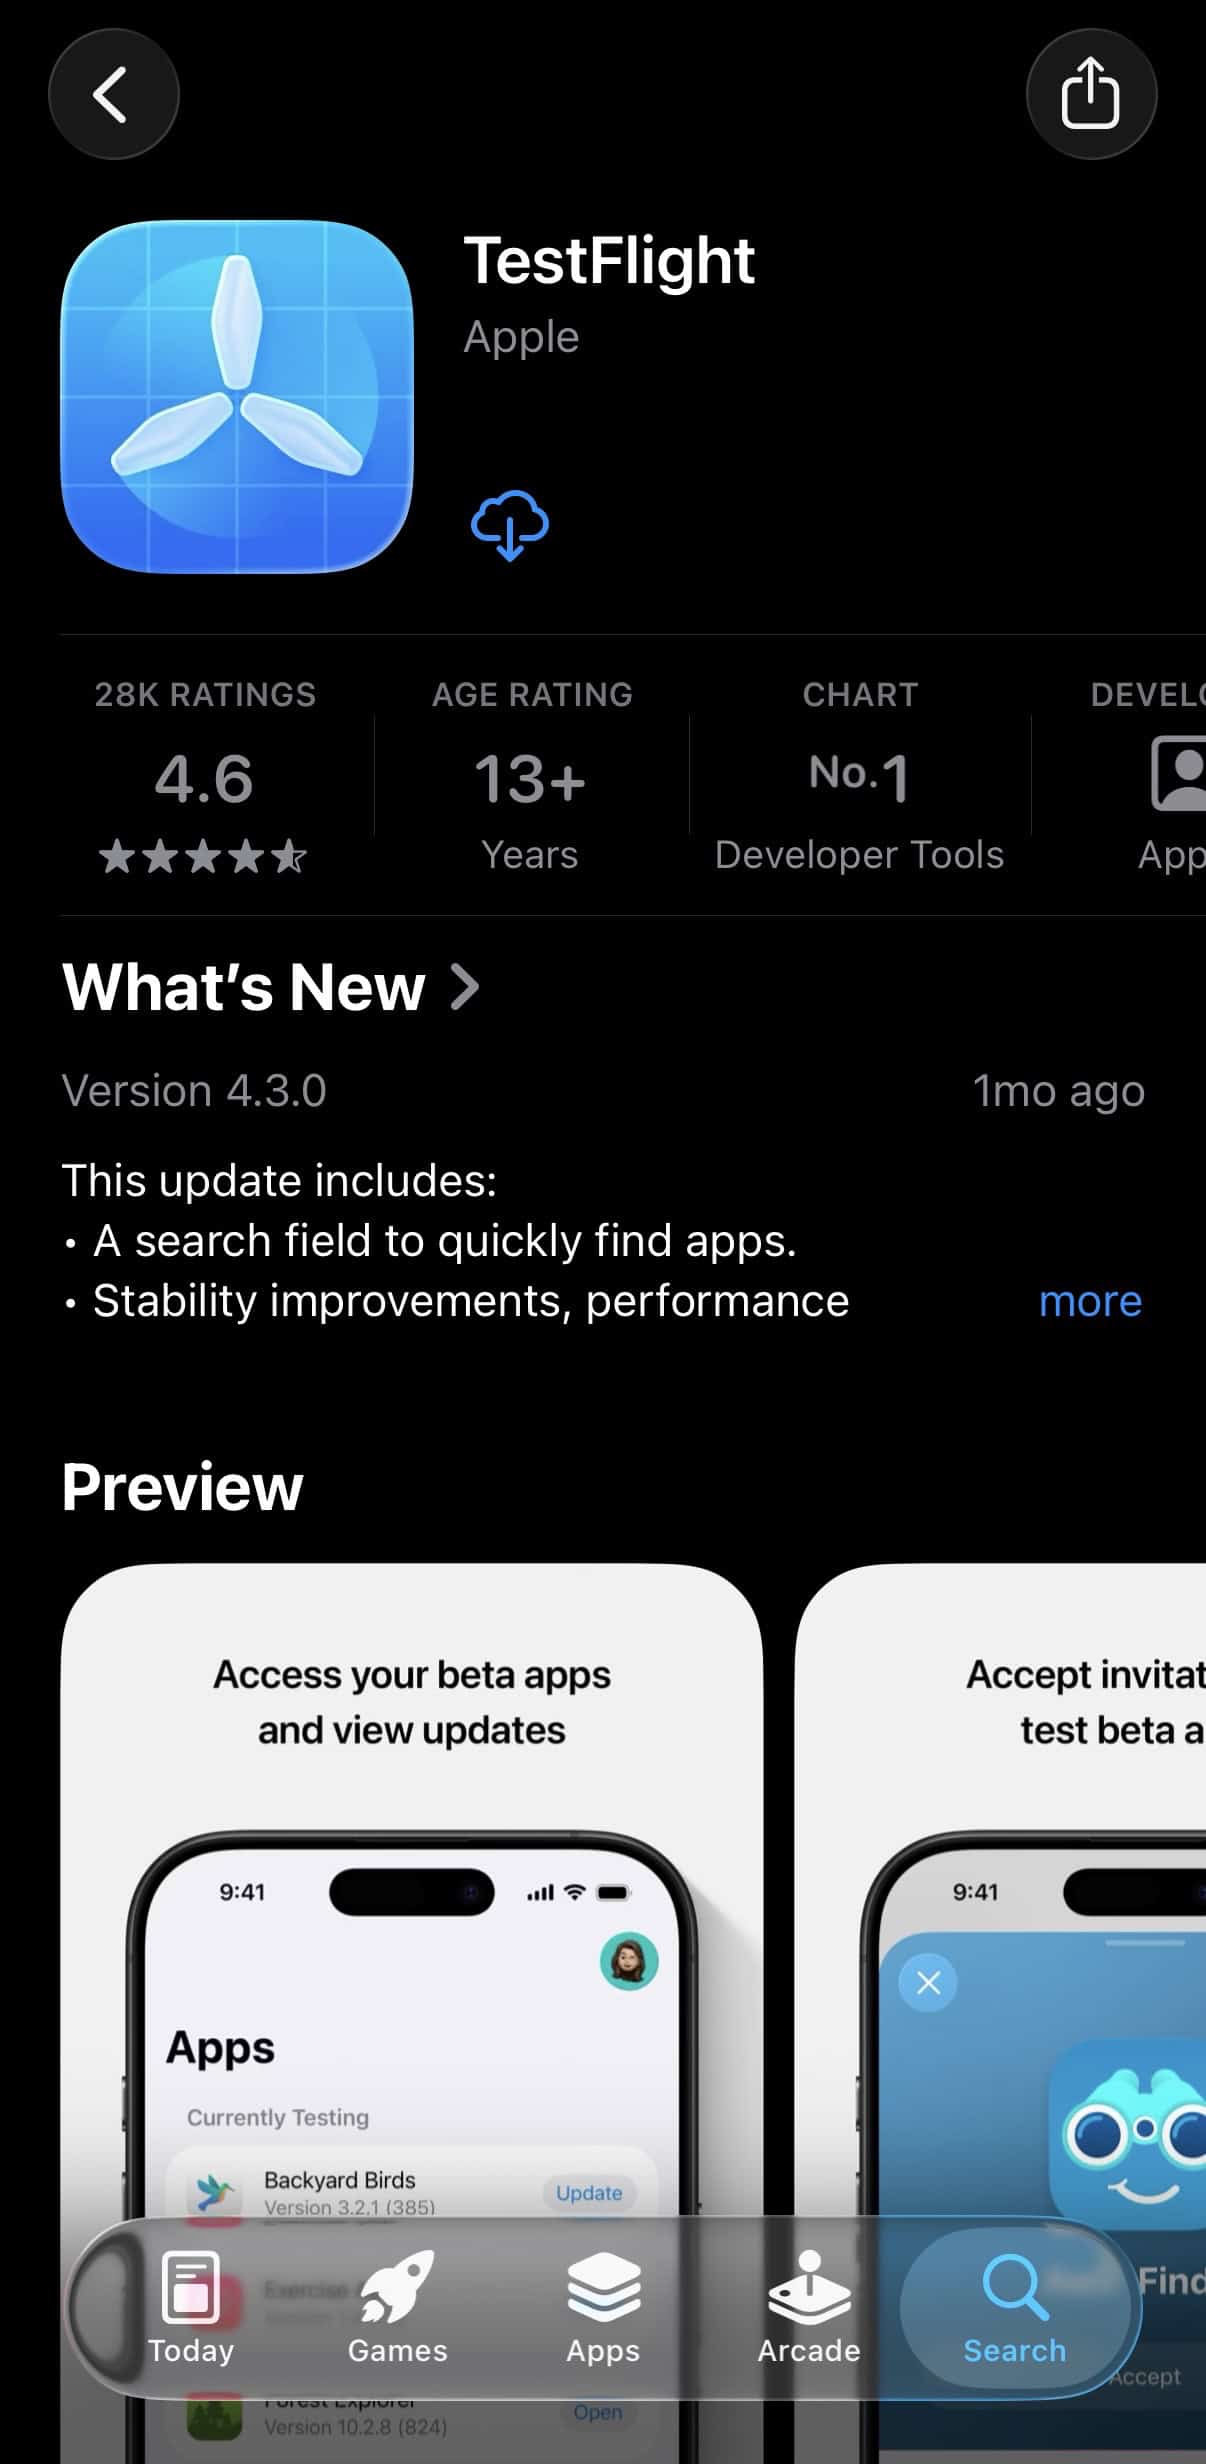
TestFlight app listing in the App Store

2. Install TestFlight

If you don’t already have the TestFlight app, your invite link will prompt you to install it from the App Store first. It’s an Apple app, free. Install it like you would any other app.

Alarm Lock's TestFlight page with the Install button

3. Install Alarm Lock

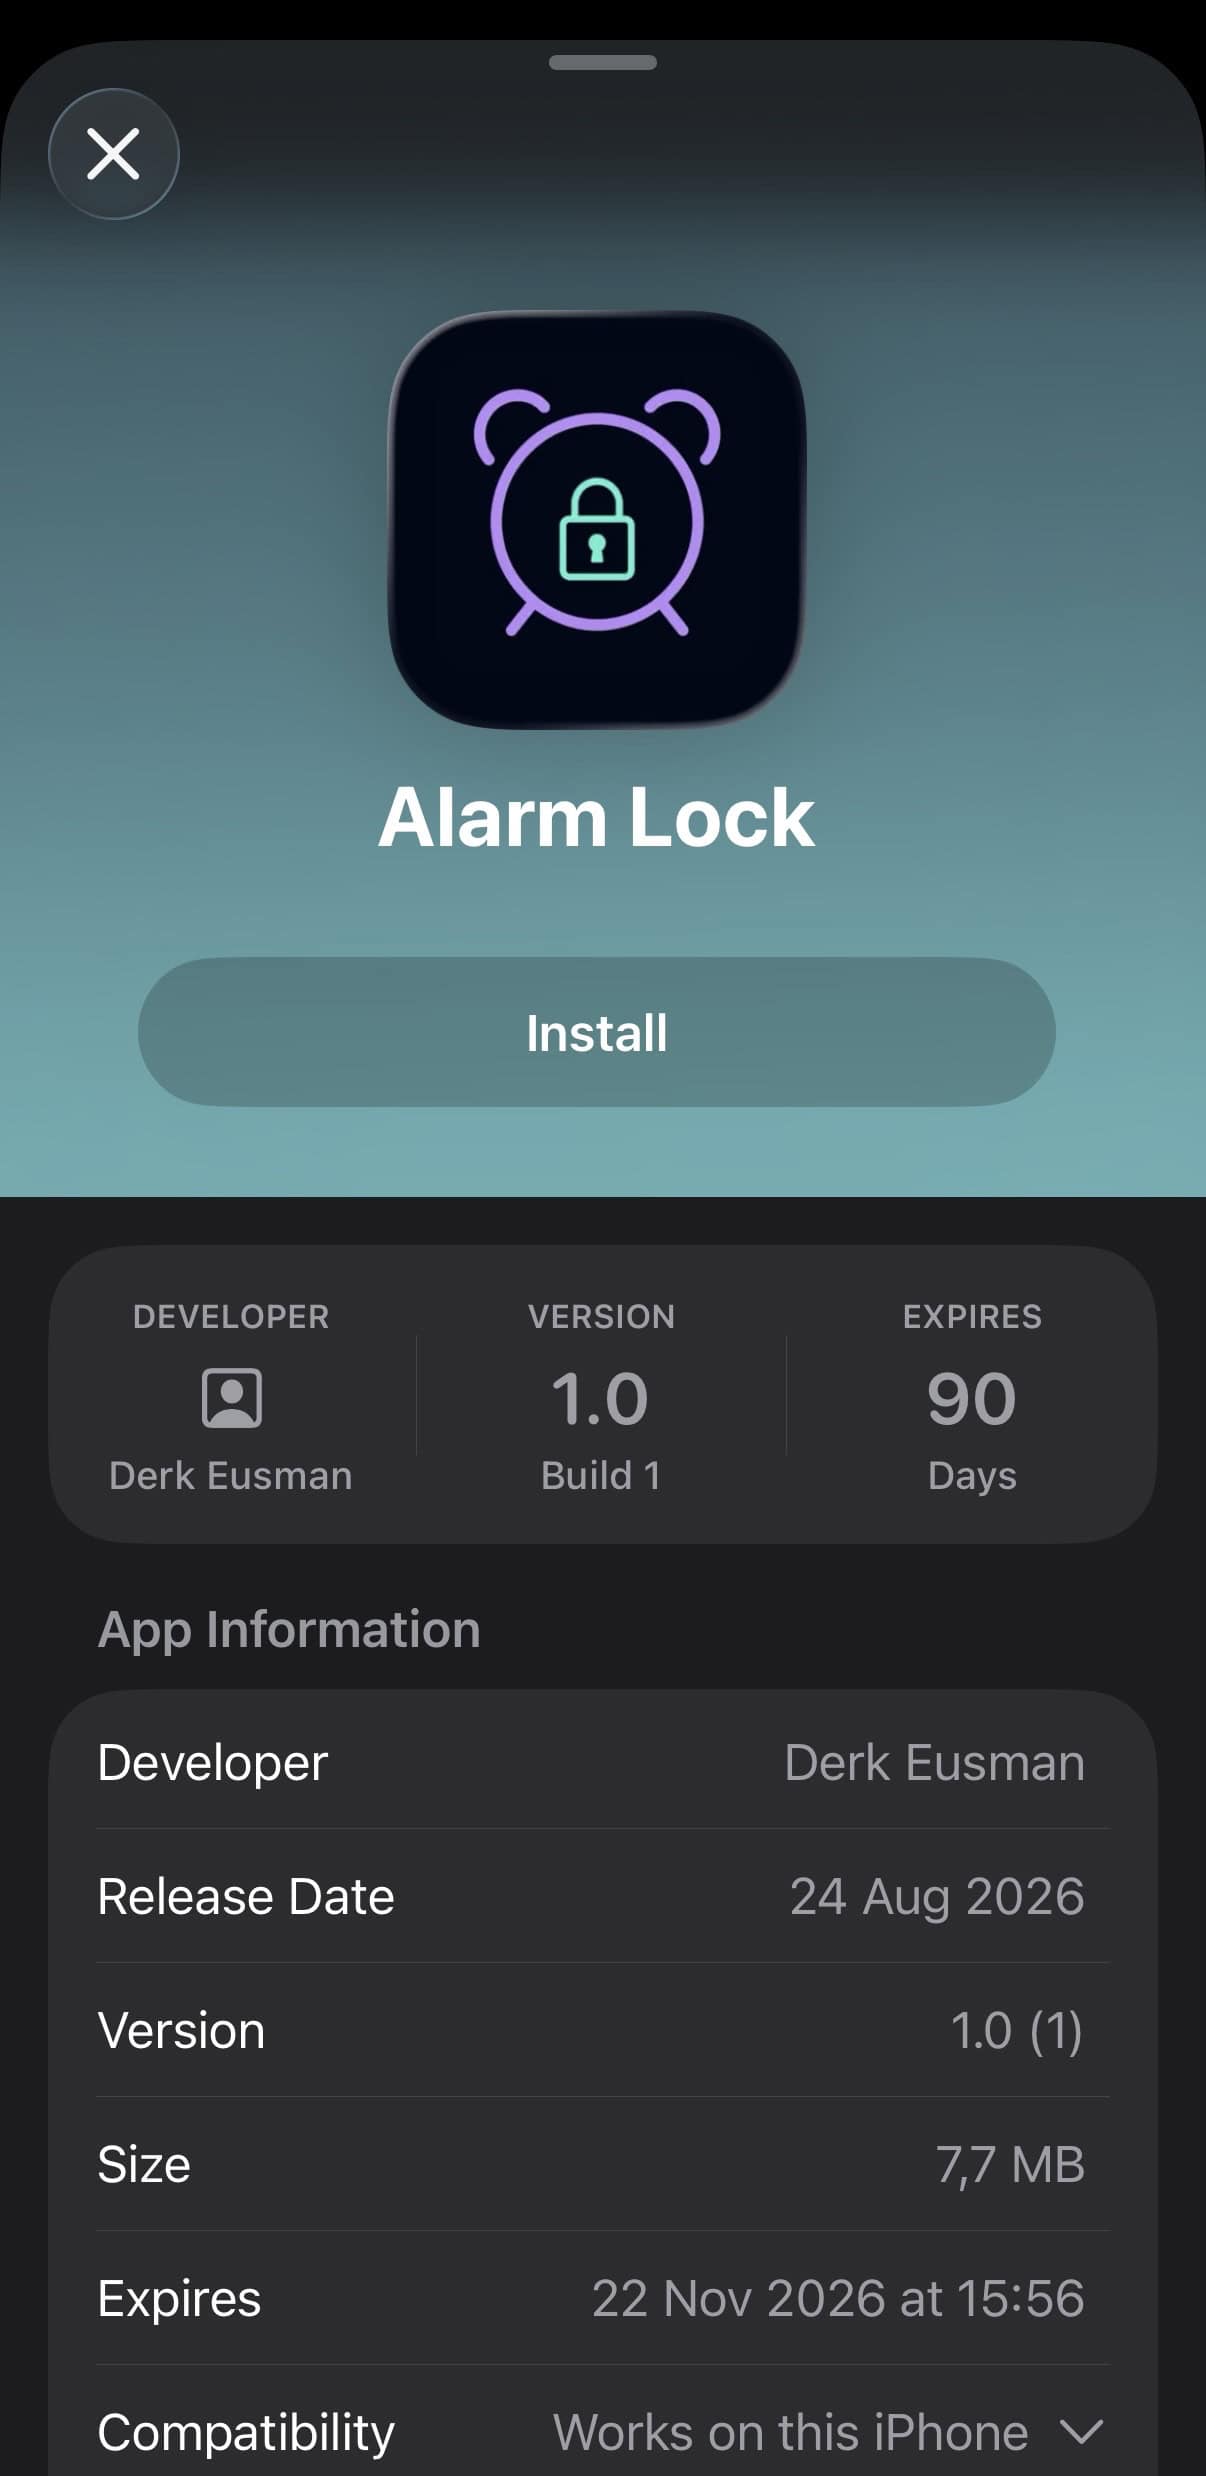
Tapping the link in your email opens Alarm Lock’s page inside TestFlight, showing the developer, version, and how many days the build has left before it expires. Tap “Install,” and it downloads the same way the App Store downloads a normal app.

4. Find it and open it

Alarm Lock shows up on your home screen with a small orange dot on the icon. That just means it’s a beta build, not a bug.

Open it, and the app walks you through registering your first NFC tag and setting your alarm. See the separate getting-started post for the full walkthrough. If anything looks off or breaks, TestFlight has a built-in feedback tool, just shake your phone or use the TestFlight app itself to send a screenshot and a note directly to me. You can use the markup feature to point out things on the screenshot.

A couple of things worth knowing

Thanks for being one of the people willing to try something unfinished. It’s the only way this gets better.