The first time you open Alarm Lock, a short getting-started screen introduces the idea. Since you won’t have an alarm set yet, it drops you straight into creating your first one. In order to activate it, you will need to register an NFC tag.
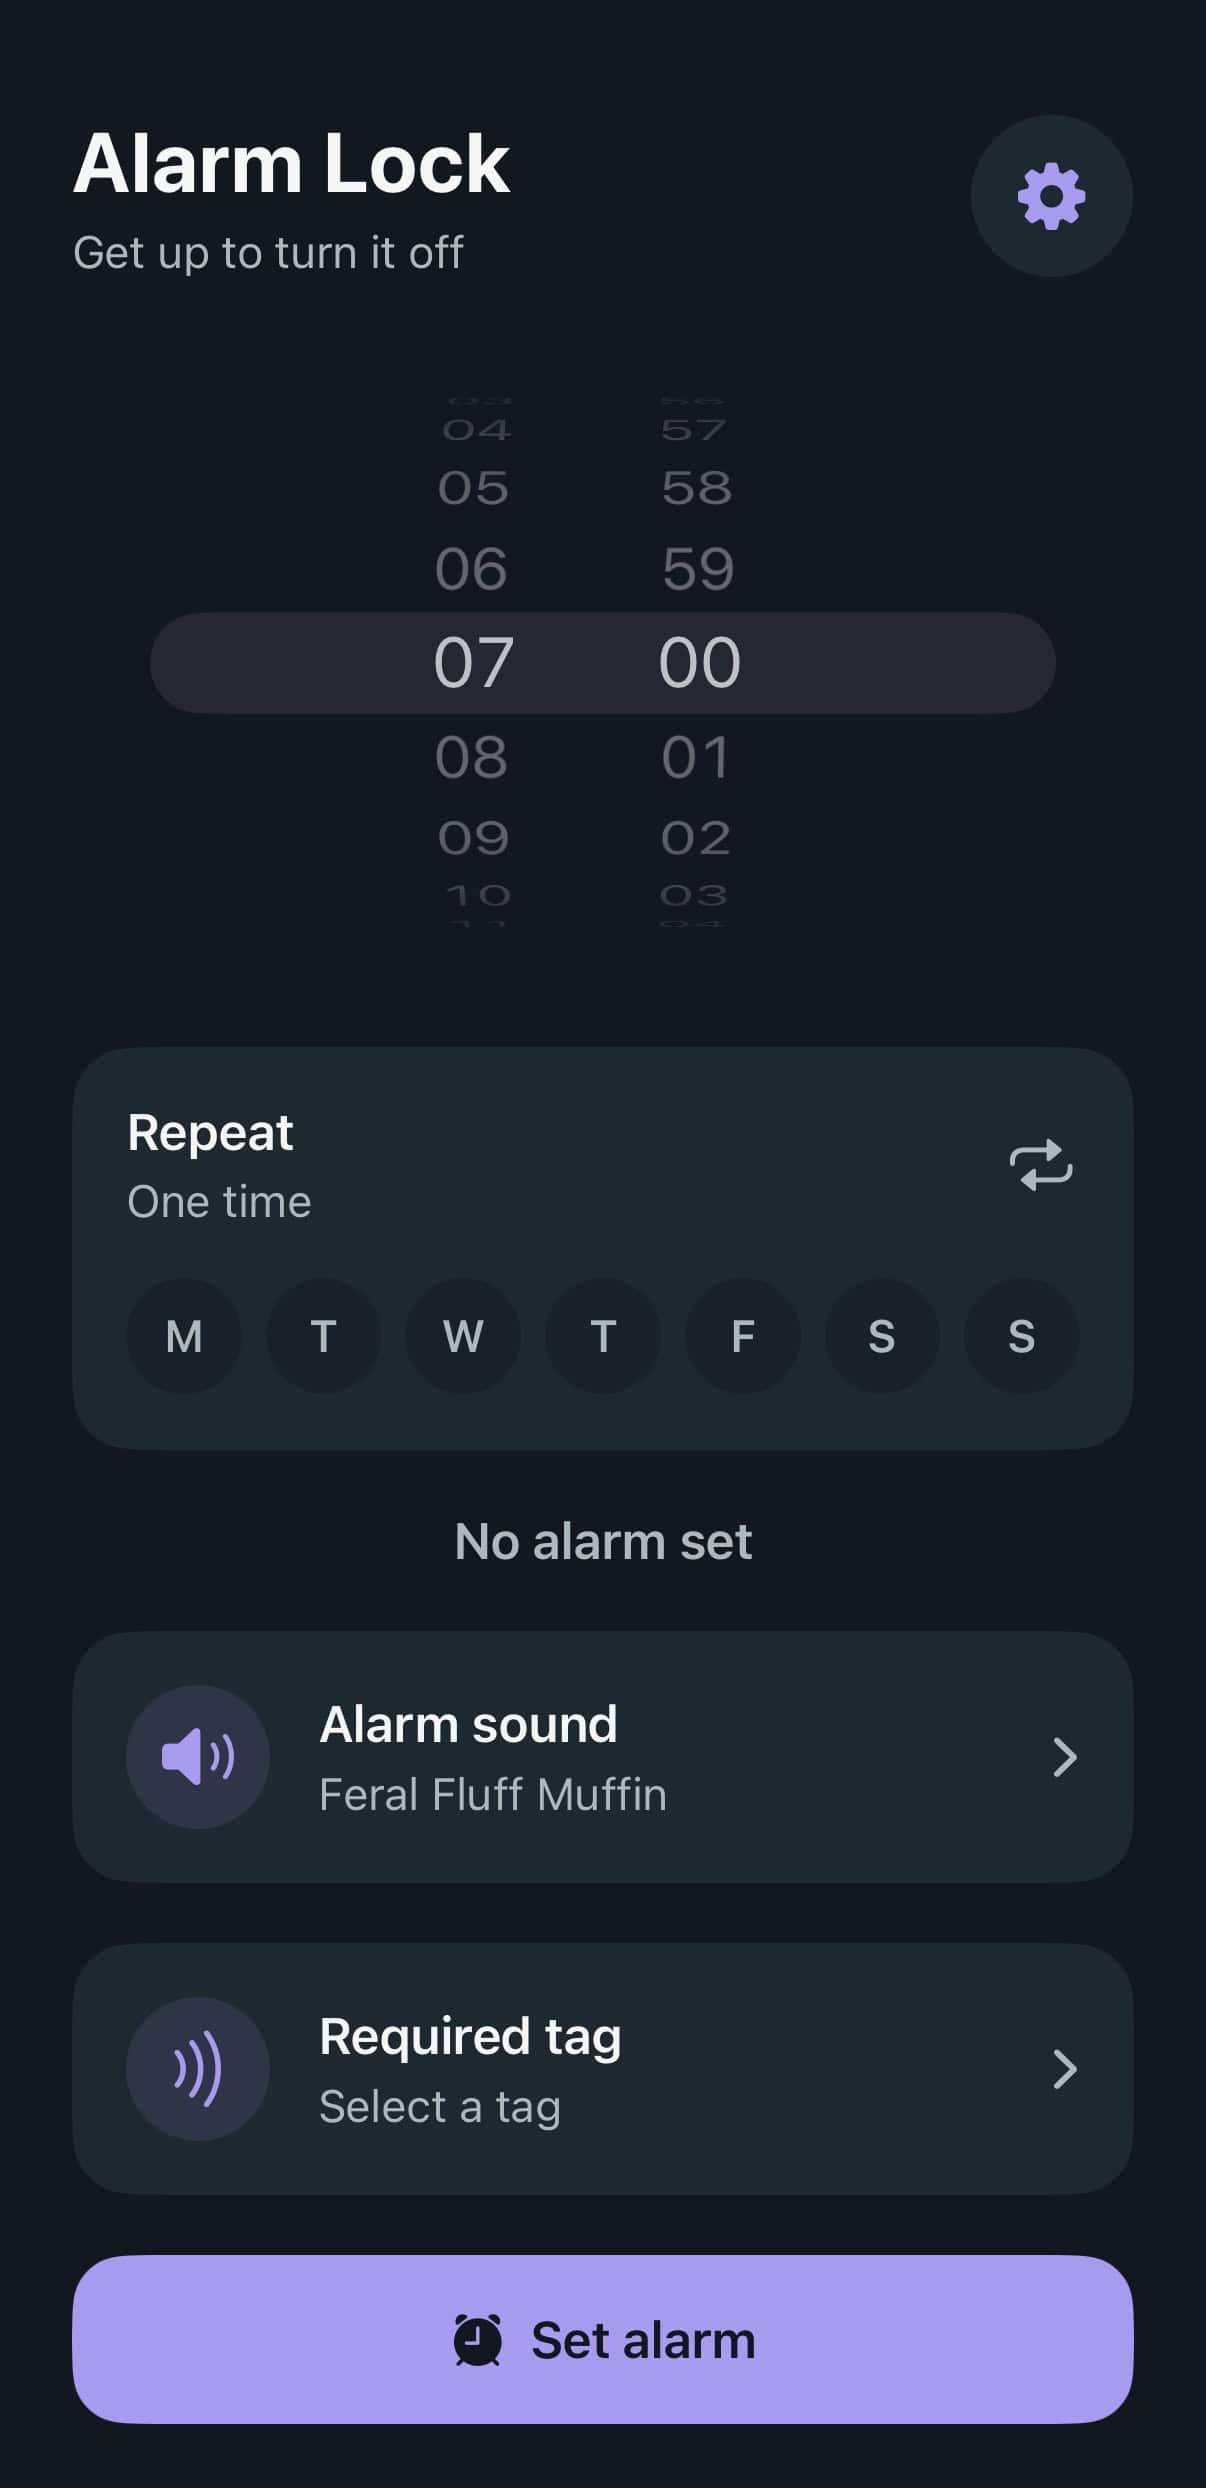
1. Pick a time
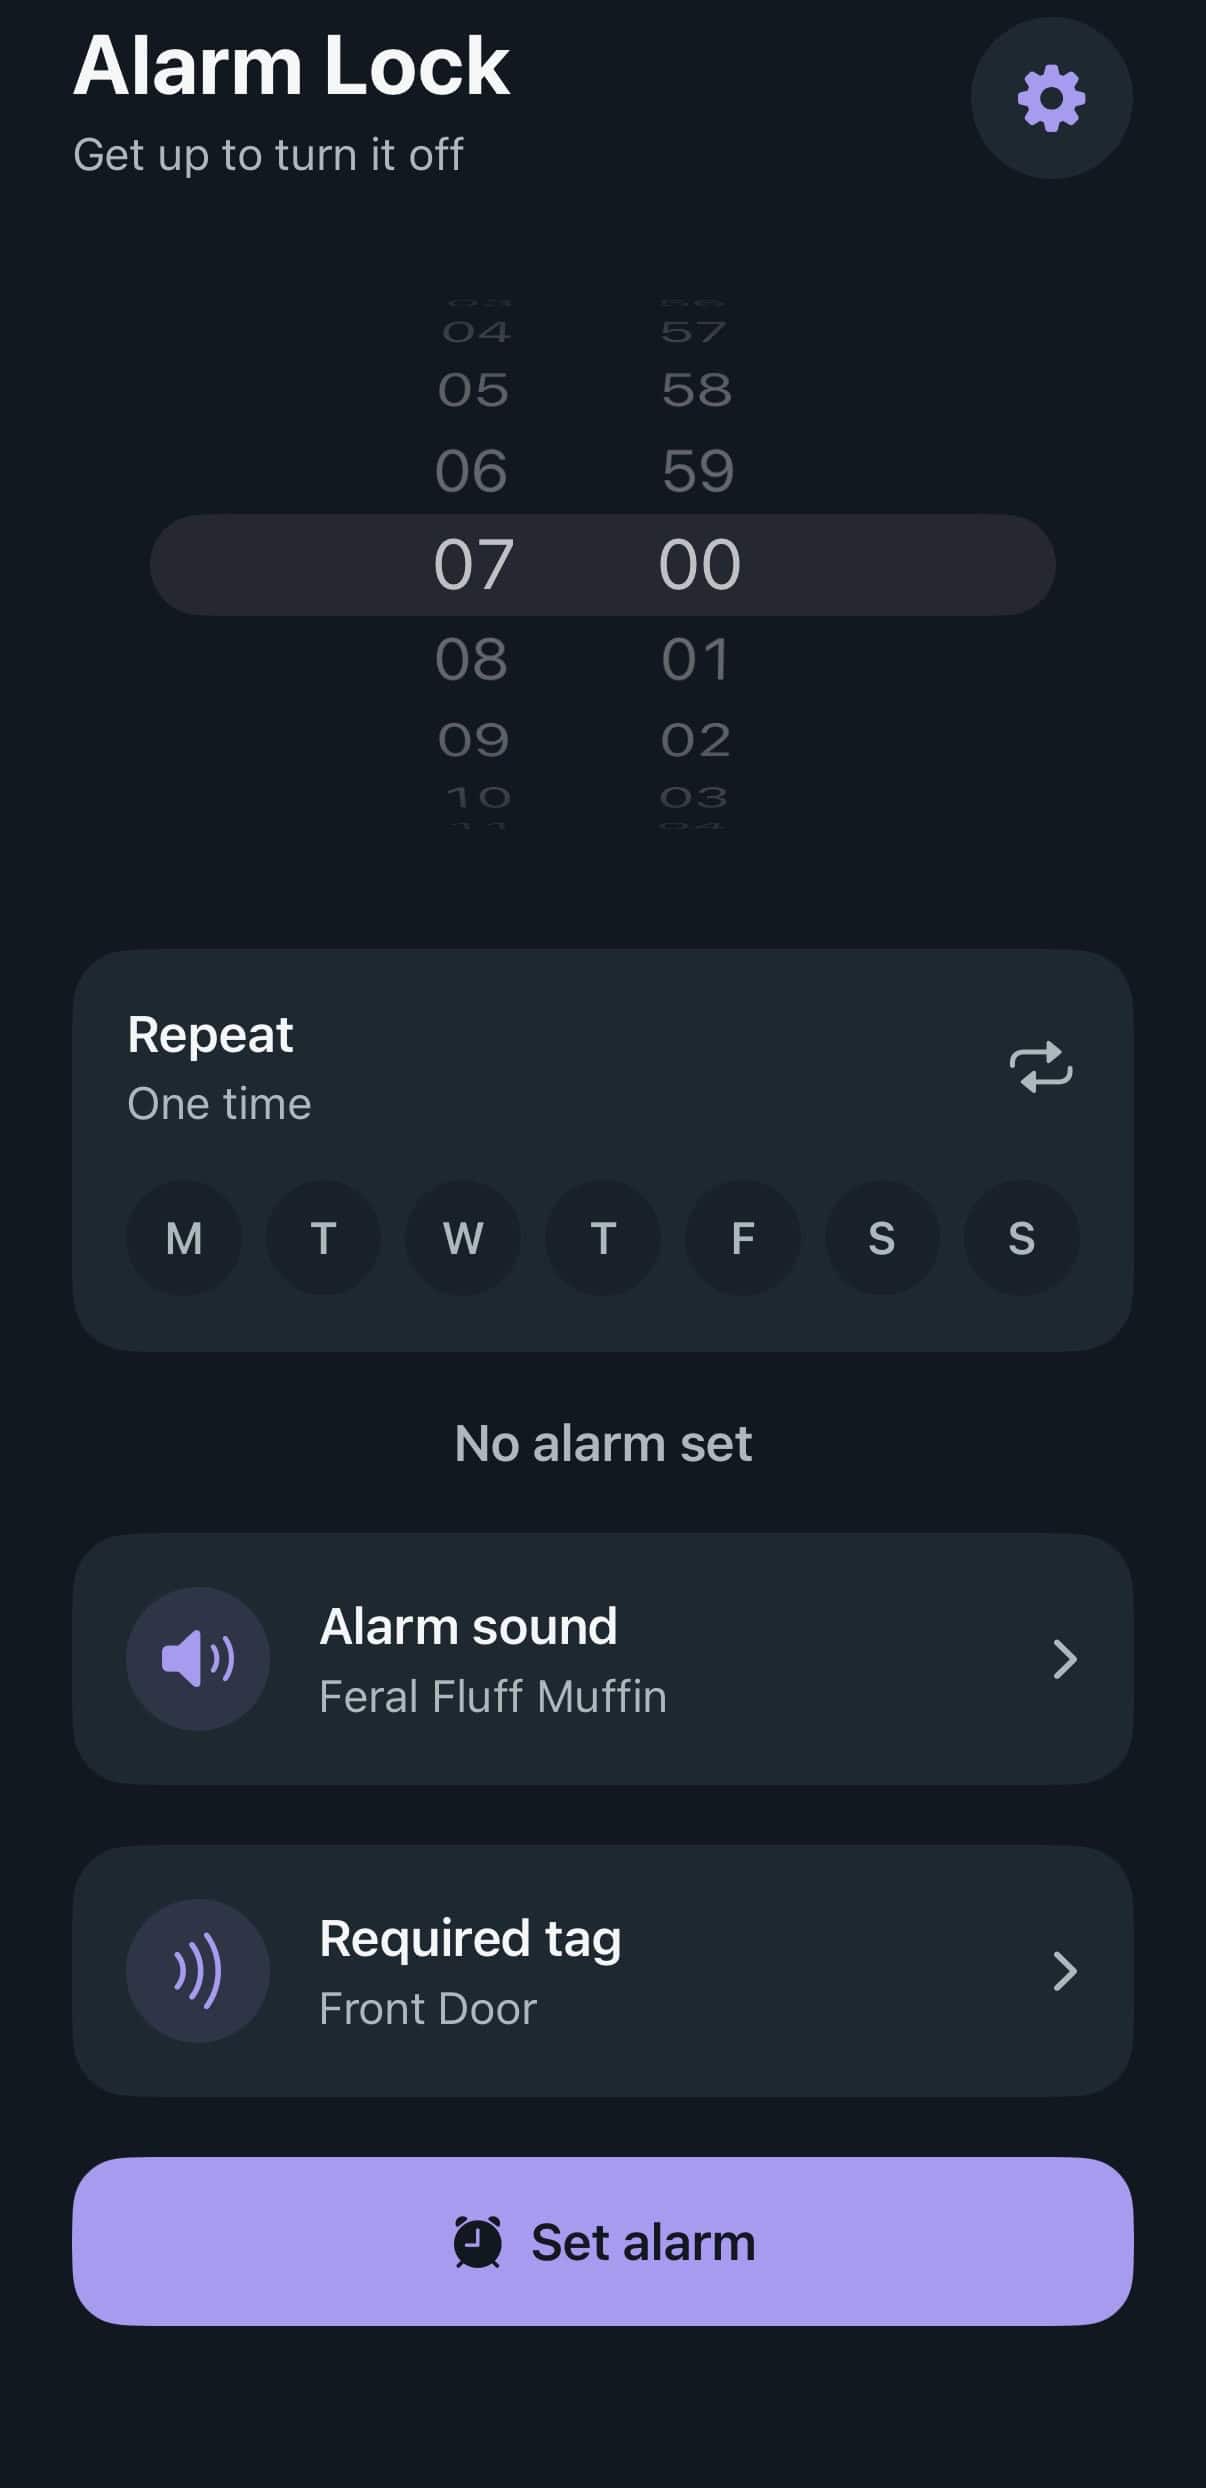
You land on the alarm creator right away. Pick your time, everything else on this screen fills in as you go.
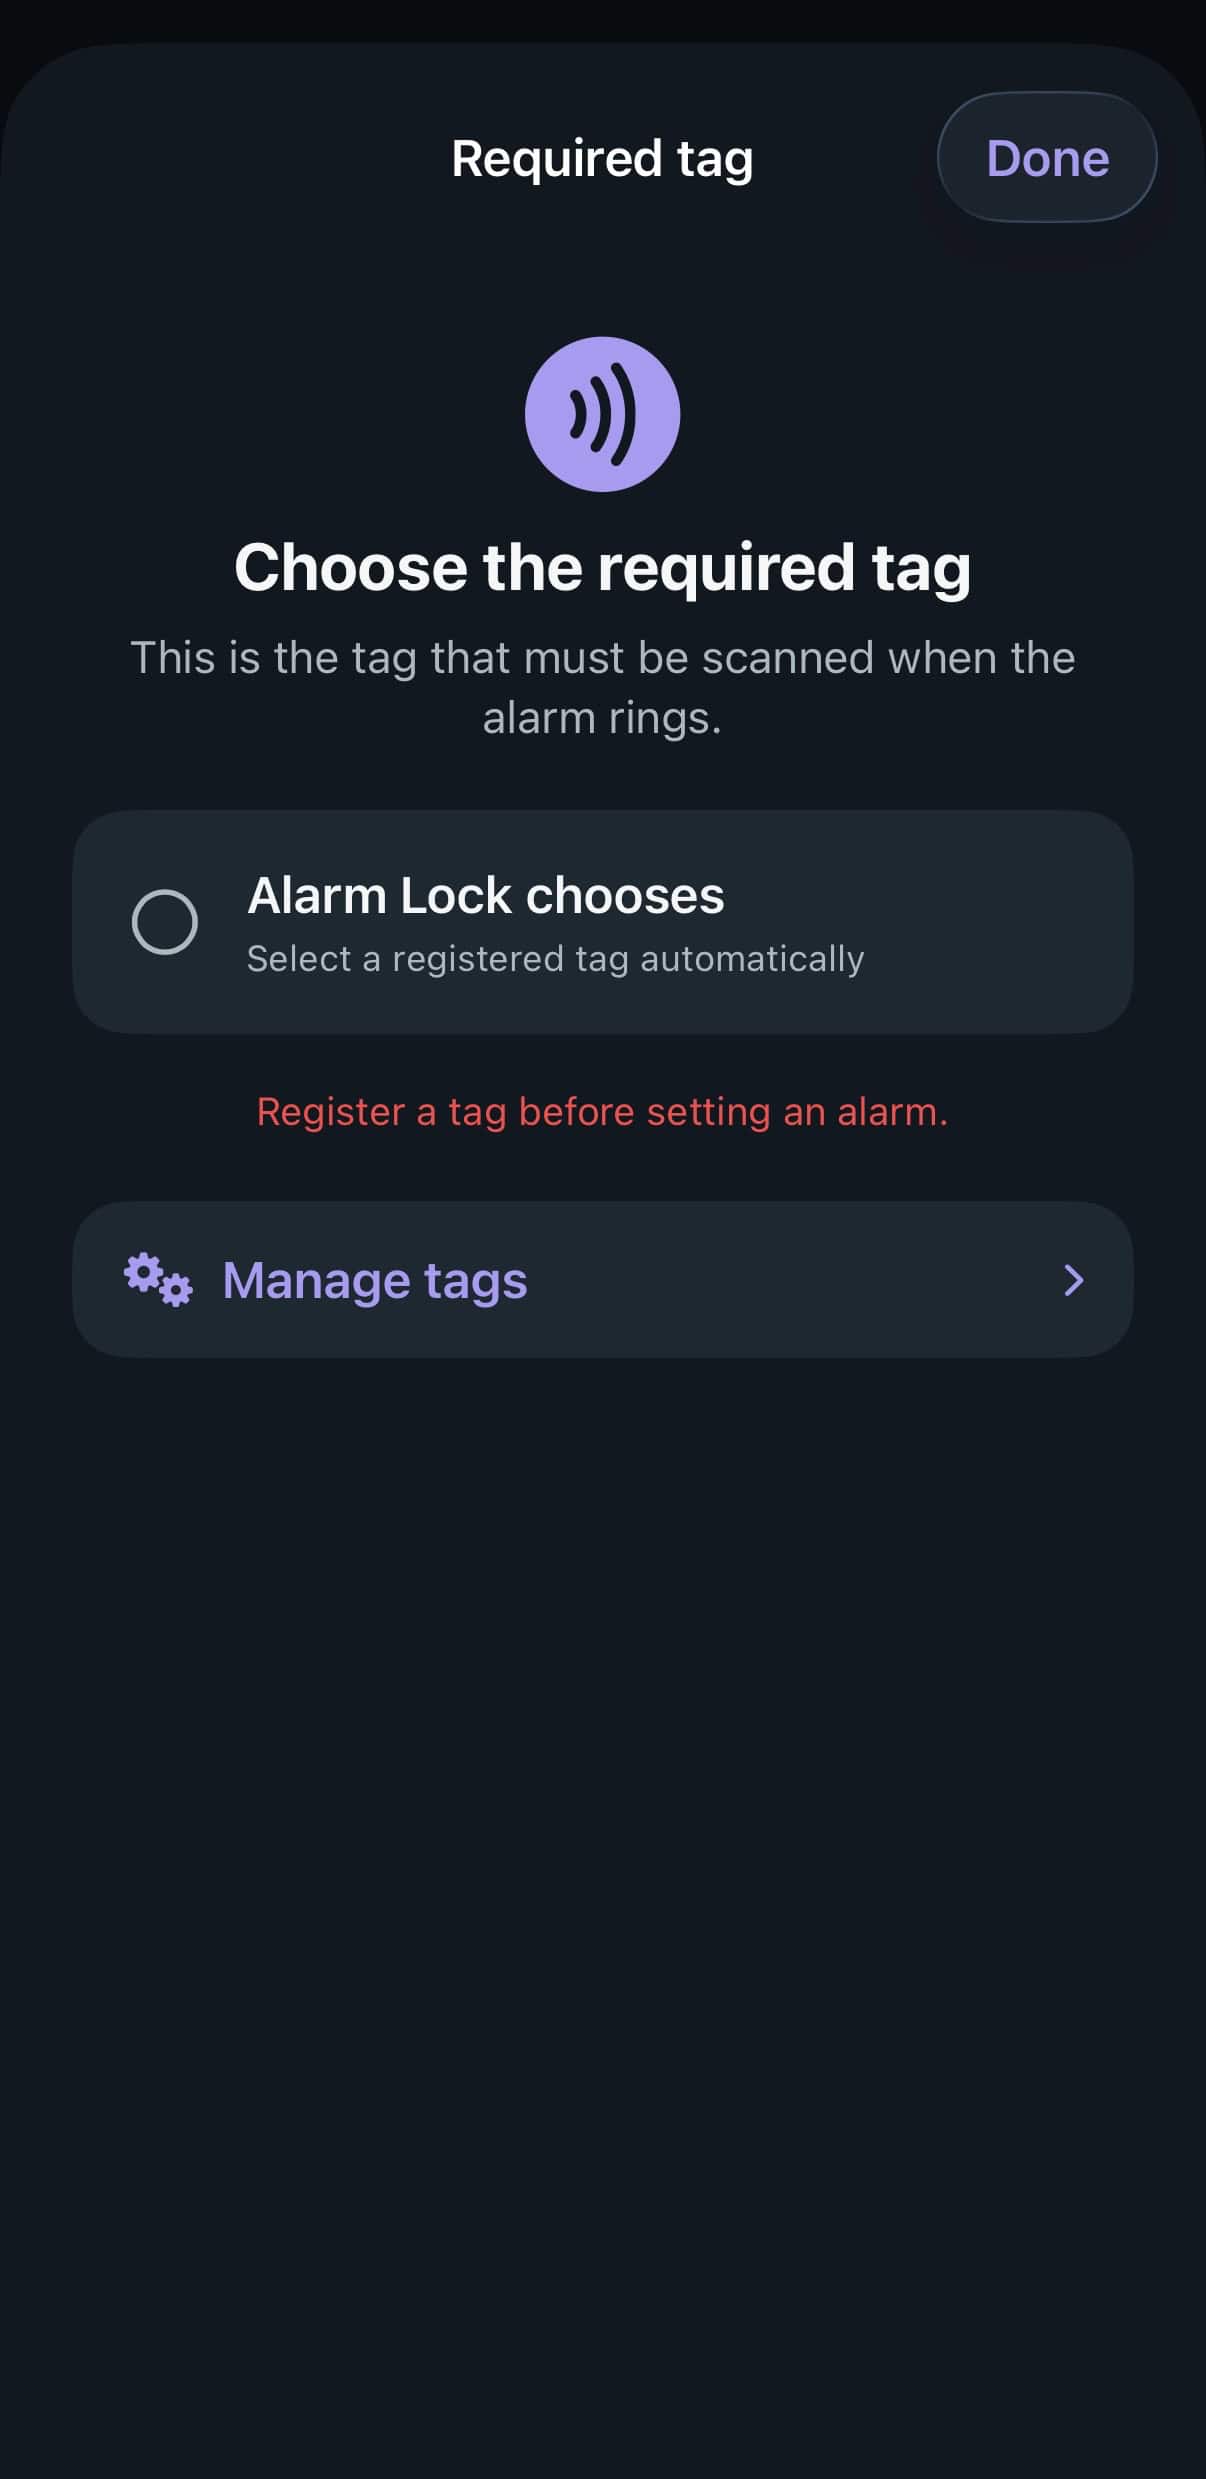
2. It stops you here, on purpose
Tap “Required tag” and, since you haven’t registered one yet, Alarm Lock stops you here on purpose. There’s no point setting an alarm you can’t actually dismiss.
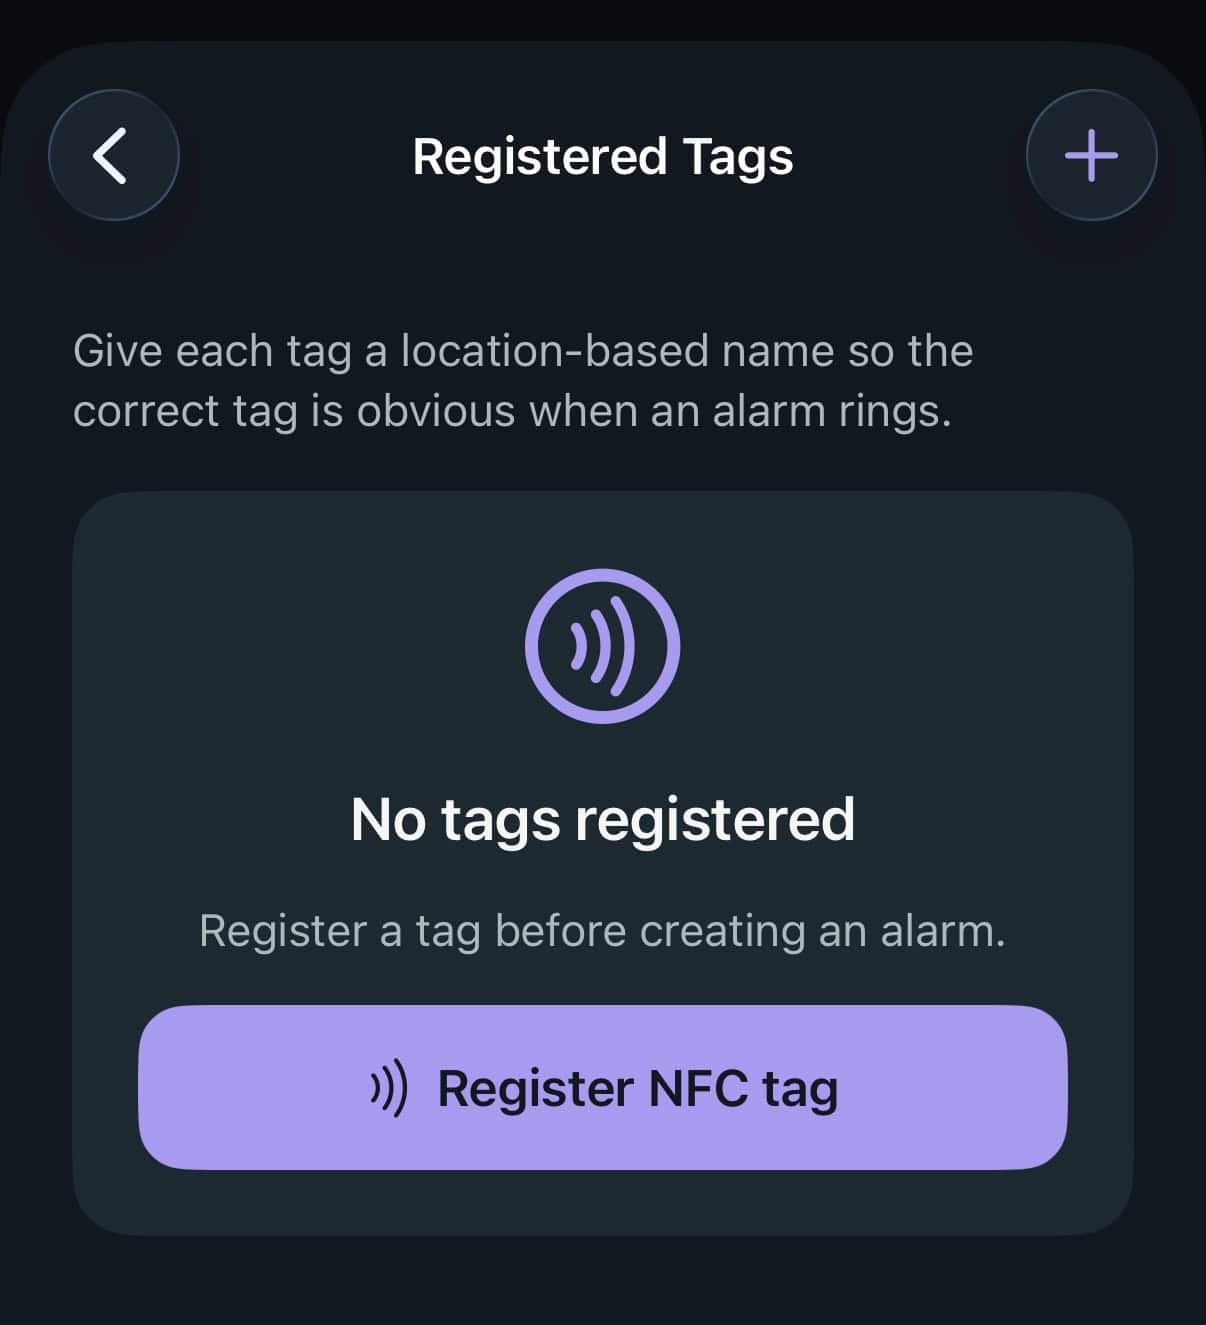
3. Start from an empty list
Tap “Manage tags” to go to your tag list it’s empty, for now.
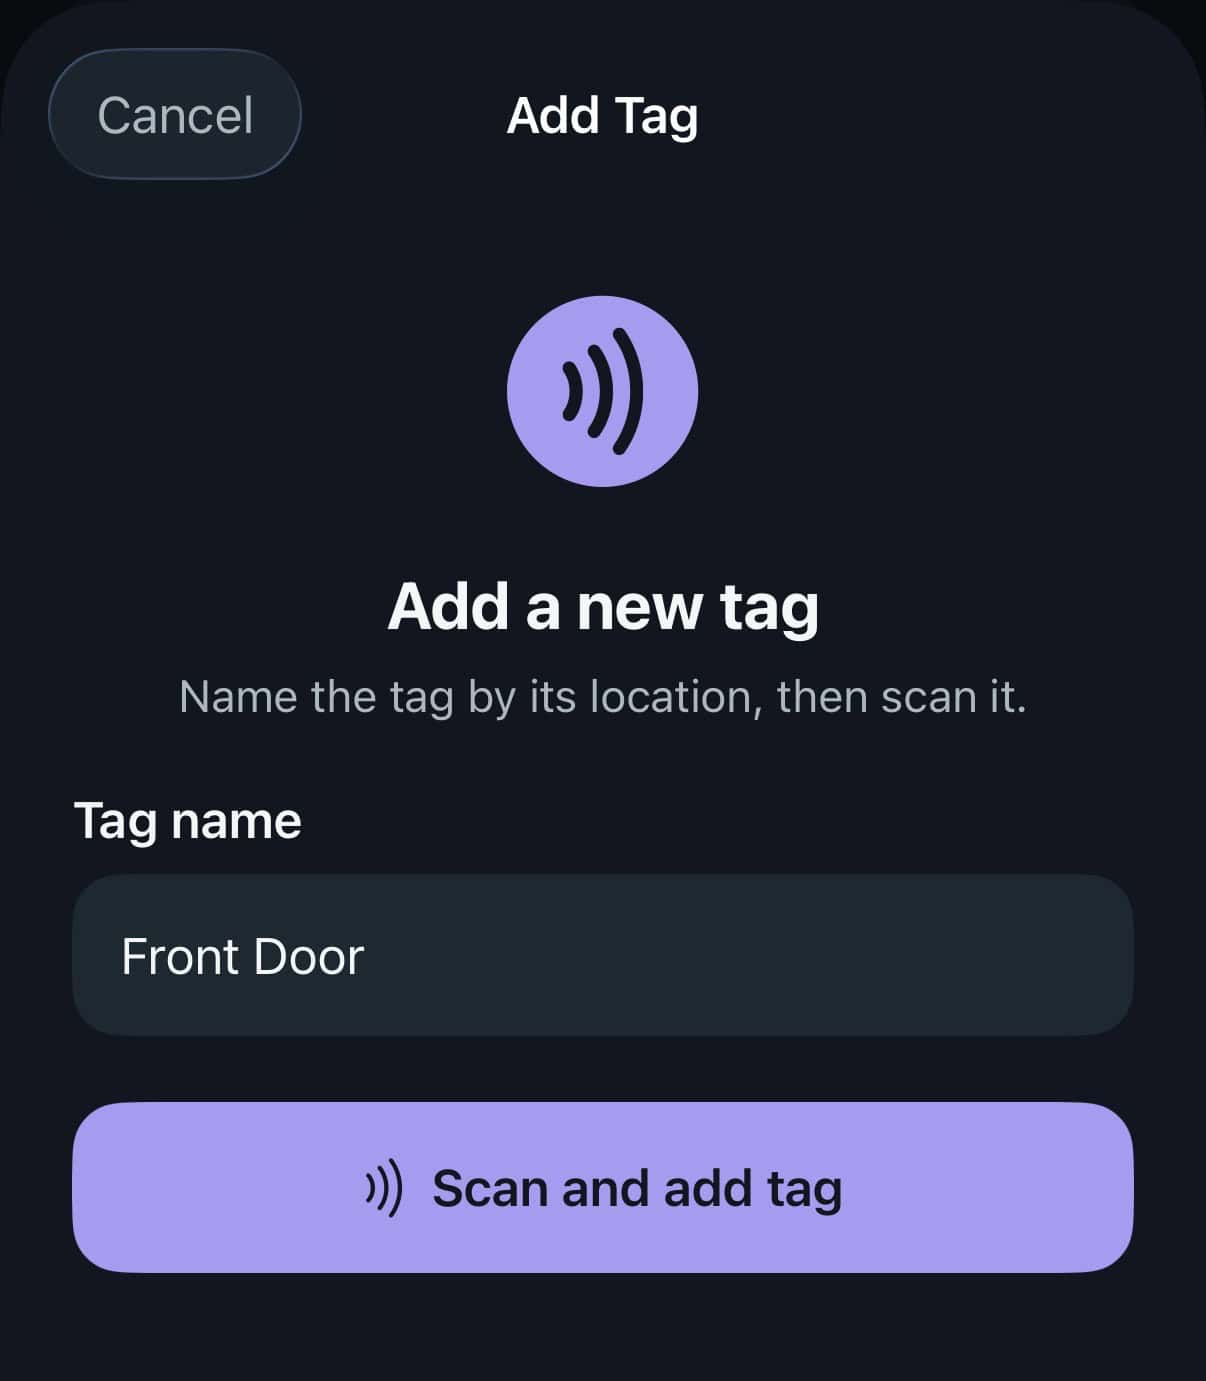
4. Register your first tag
Tap “Register NFC tag,” give it a name based on where you’re putting it and scan it. “Front Door” tells you something useful at 6am; “Tag 1” doesn’t. Tap “Scan and add tag” to register your tag.
5. Your tag is set
Back on the alarm screen, your new tag is now selected as the required tag.
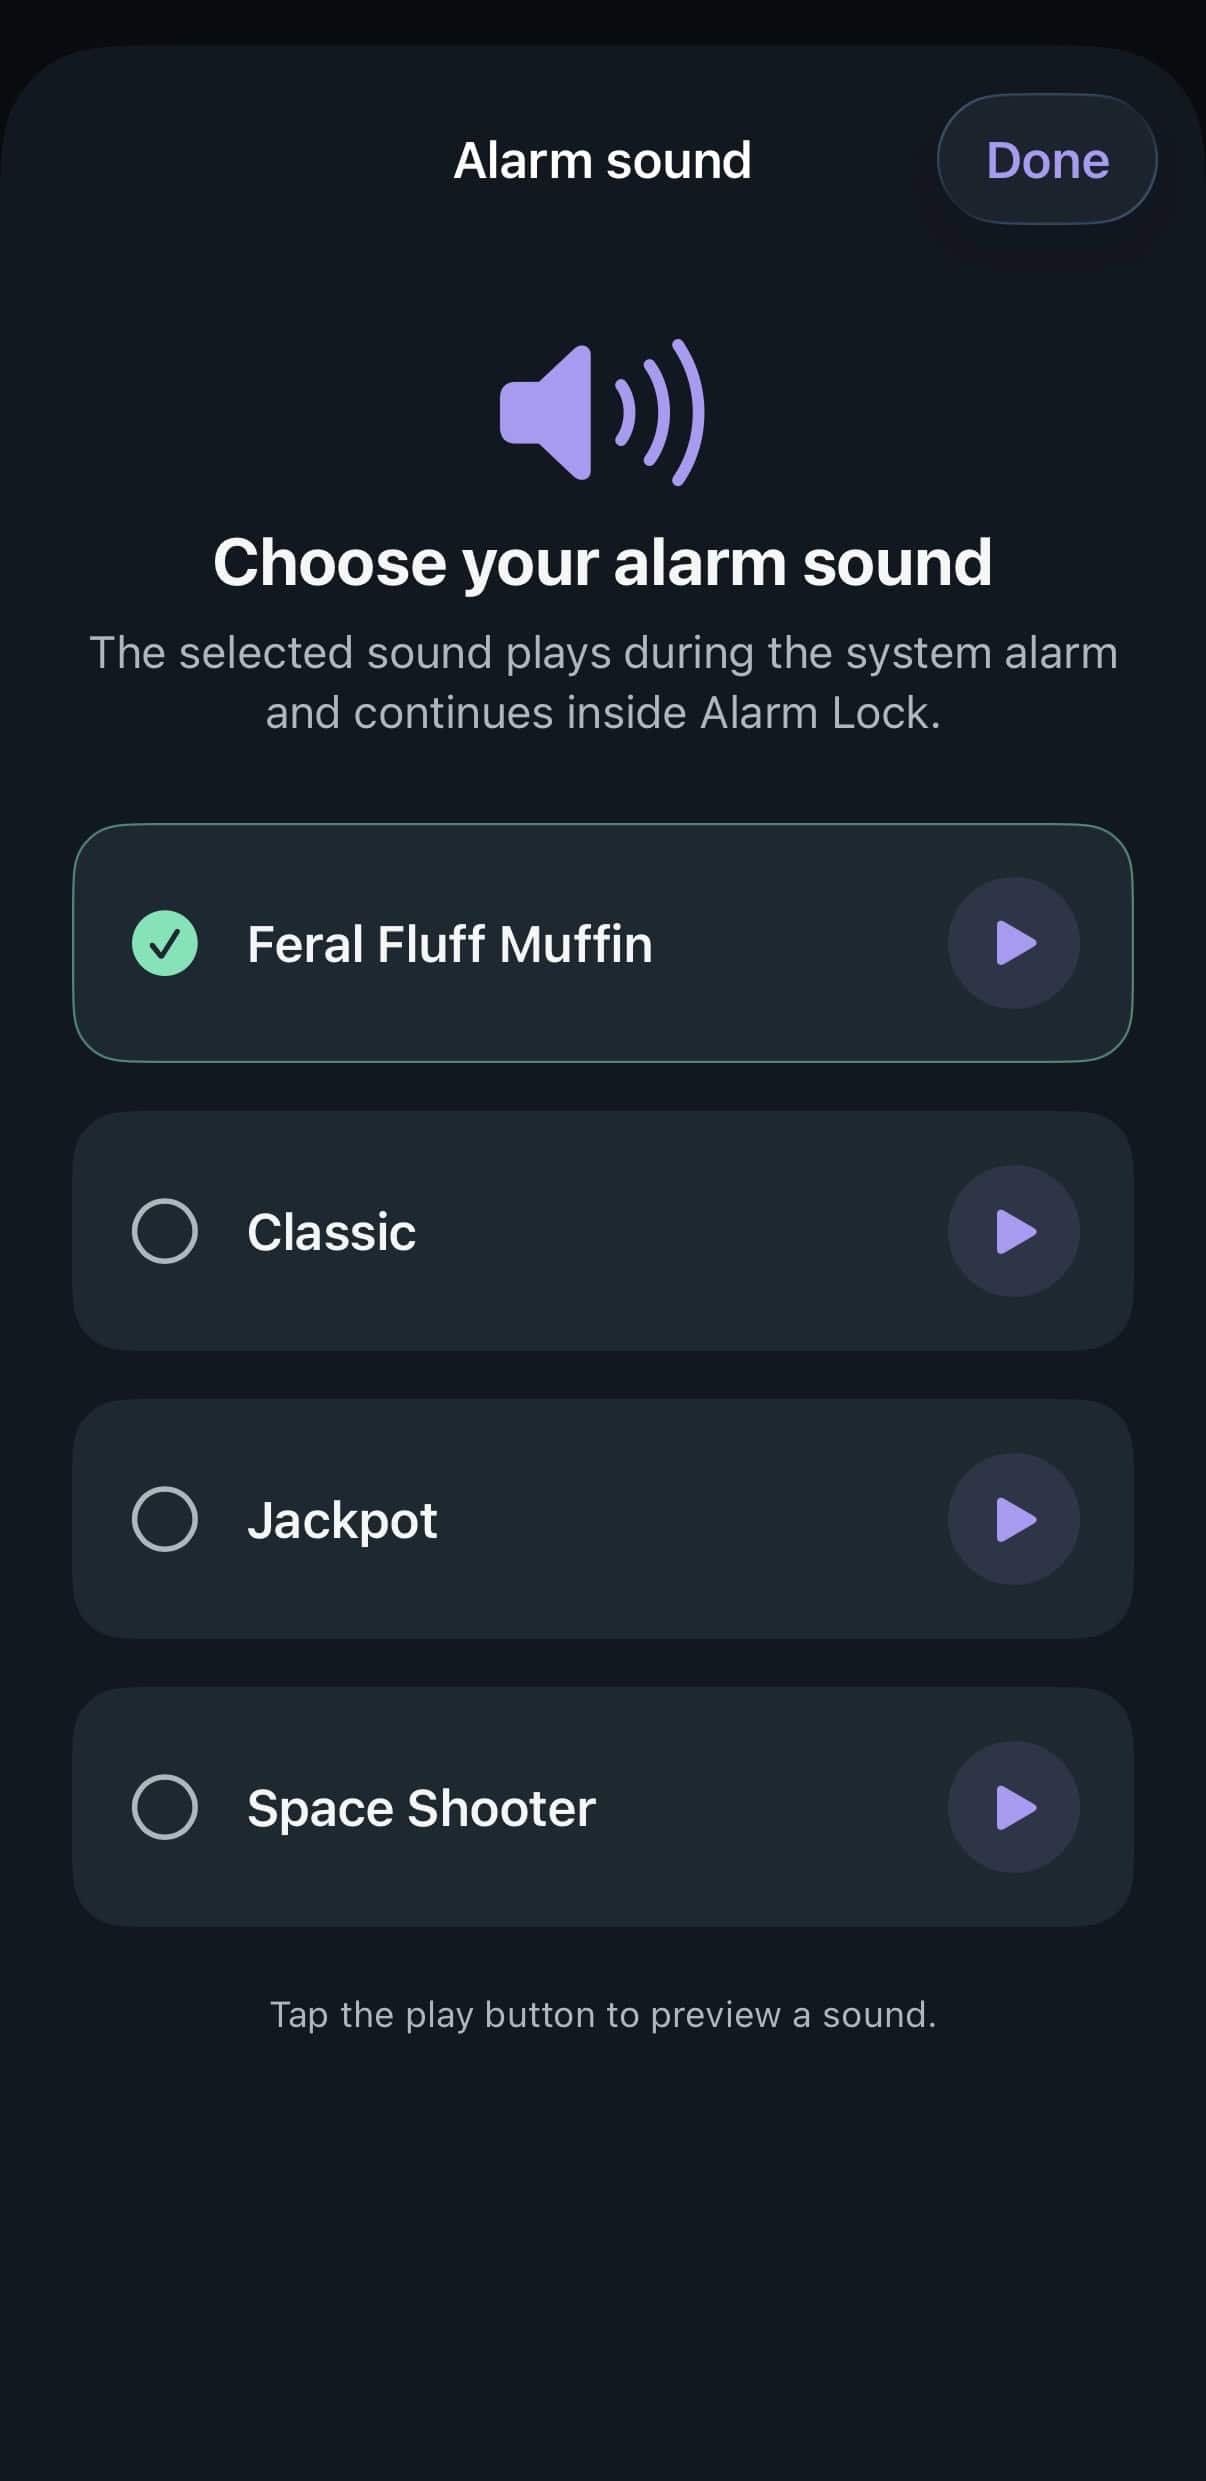
6. Pick a sound
Pick an alarm sound. Tap the play button on each to preview before you commit to waking up to it in the morning.
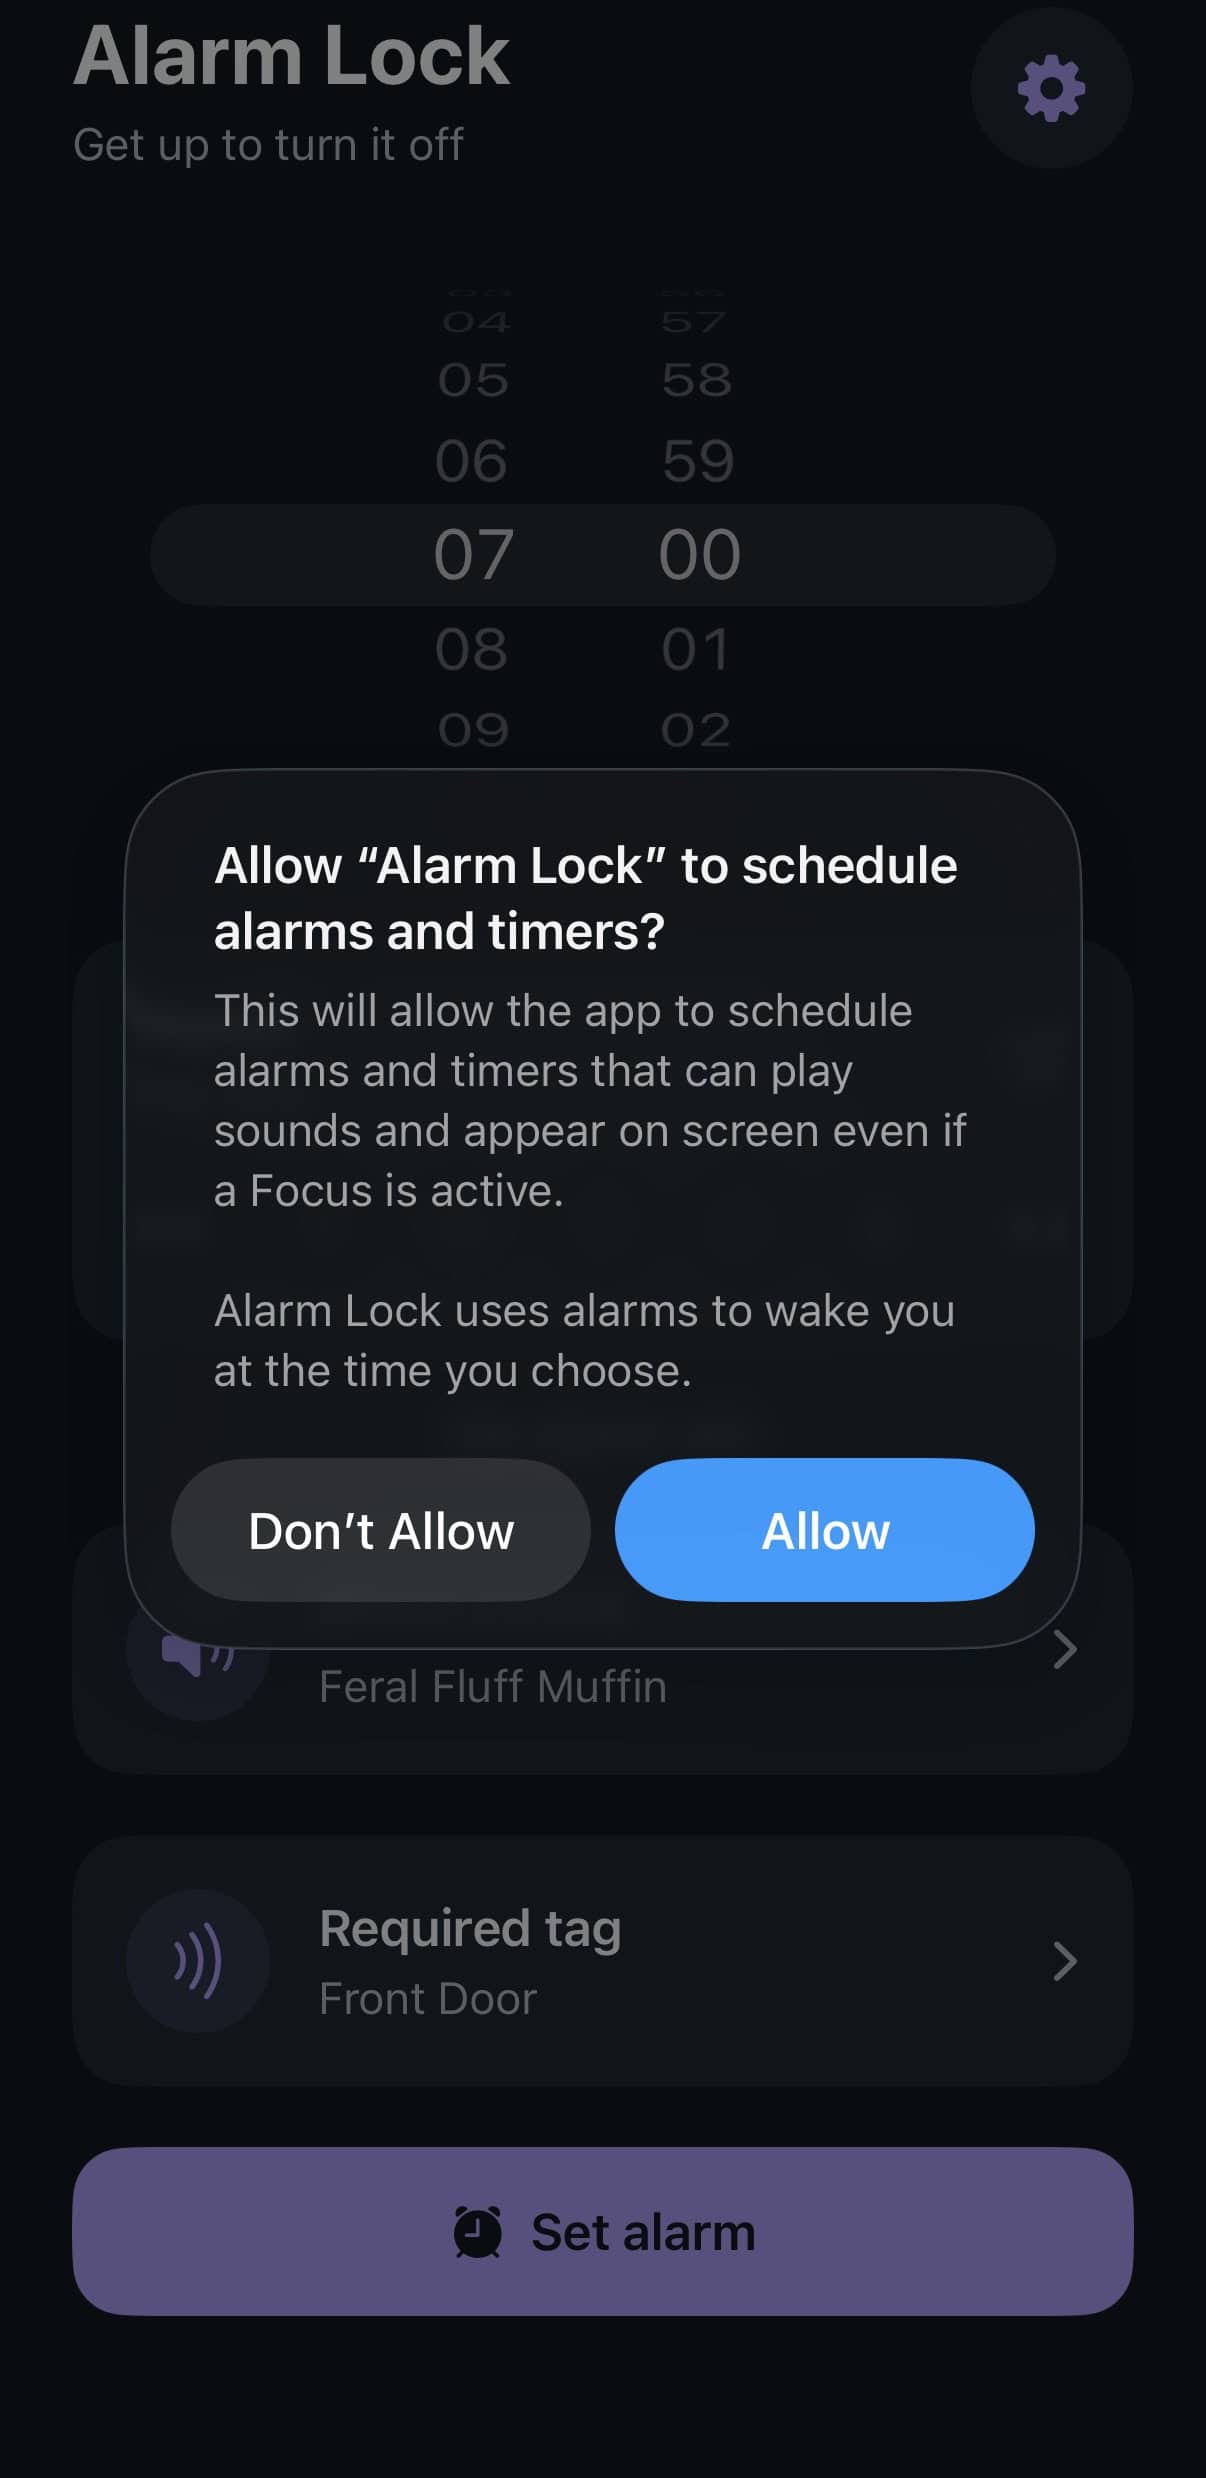
7. Allow the one-time system prompt
The first time you tap “Set alarm,” iOS asks permission for Alarm Lock to schedule alarms and timers. This is a standard system prompt, not something Alarm Lock can skip. Tap Allow, or the alarm won’t actually go off.
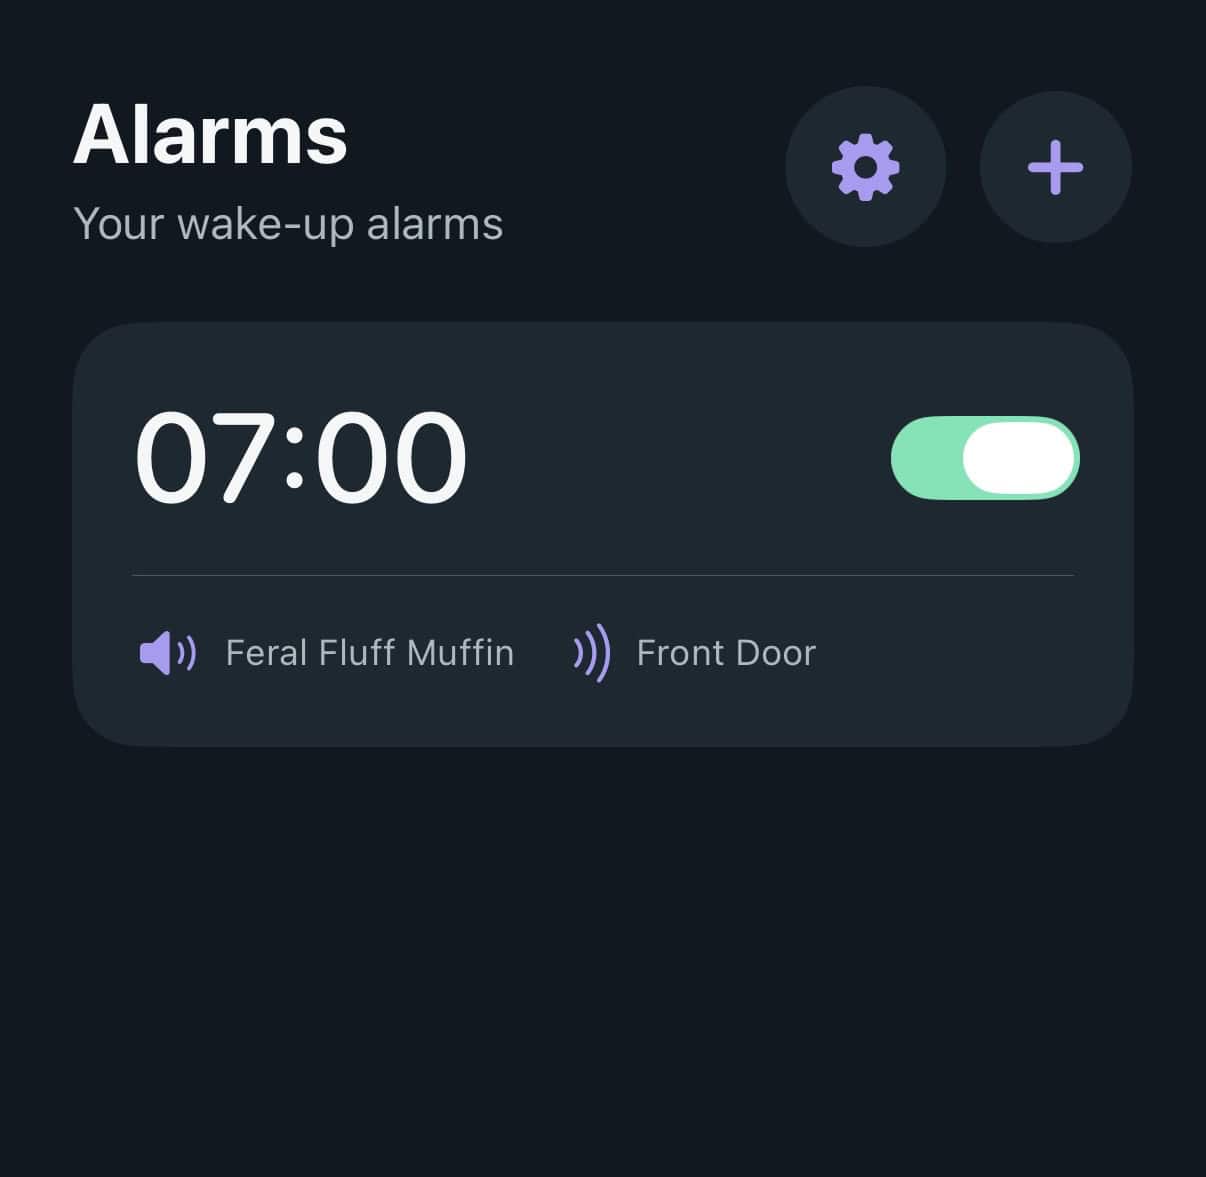
8. Done
Your alarm now shows up on the main Alarms screen, with its sound and required tag listed underneath.
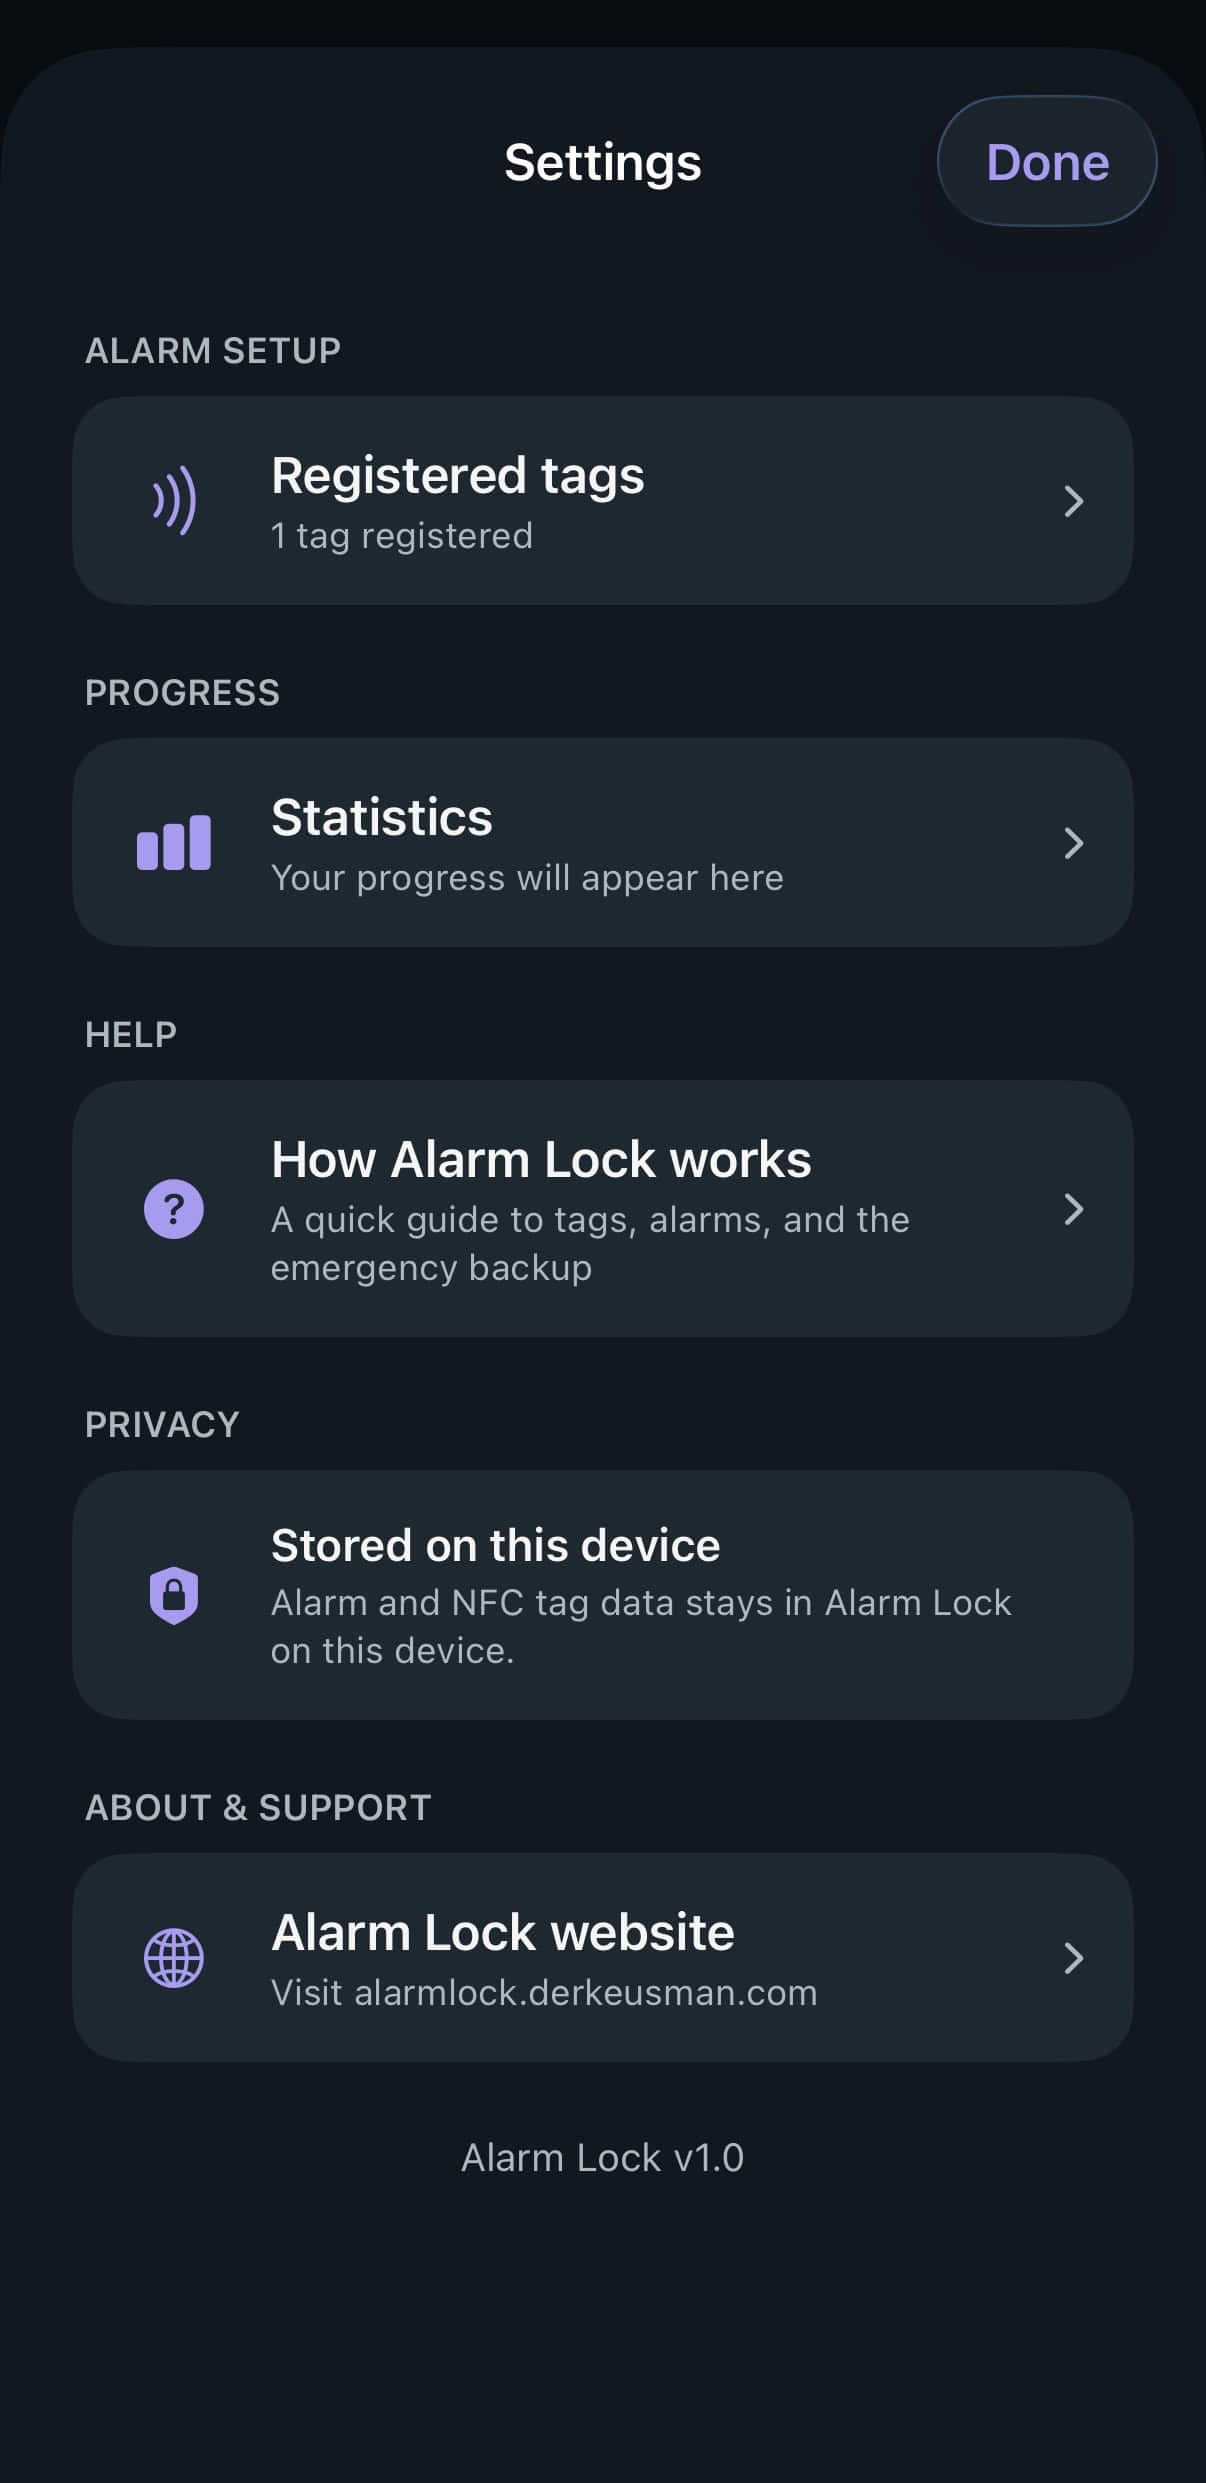
9. Worth a look: Settings
The Settings screen has a “How Alarm Lock works” guide covering tags, alarms, and the emergency backup in more detail, plus a straightforward privacy note: alarm and tag data stays on this device.
That’s it! You’re set up. If any of these steps didn’t match what you saw, or something felt confusing, that’s exactly the kind of feedback worth sending through TestFlight.
This is still a beta version, please do not yet rely on Alarm Lock to wake you up in the morning